How to Build a Sea Life Gallery Wall That Actually Looks Curated
The decision-making framework for buying multiple ocean prints that actually belong on the same wall.

Most gallery wall guides assume you already own the art. This one helps you choose the right combination of marine prints from the start, so you end up with something considered rather than a random aquarium gift shop. We'll cover which subjects pair well, the colour rules that hold it together, and the exact spacing that separates a curated wall from a chaotic one.
Why sea life subjects work so well as a gallery wall theme
Marine subjects share a built-in advantage over most themes: a natural colour palette. Even when the subjects vary wildly (a sperm whale, a tuft of coral, a school of mackerel), they tend to sit within the same family of blues, greens, sandy neutrals, and the occasional warm coral or rust. That shared palette does half the cohesion work for you.
The second advantage is scale variety. A great white shark and a seahorse are wildly different in visual weight, which gives you something gallery walls often lack: a clear hero piece and supporting cast. You don't have to manufacture hierarchy. The subjects come with it.
The third reason is style flexibility. Sea life works in vintage scientific illustration, soft modern watercolour, bold graphic prints, and moody photographic work. As long as you don't mix all four in one wall, you have genuine creative range within the theme.

Picking a colour thread: how to unify different marine subjects
This is where most sea life walls go wrong. People buy a turquoise tropical reef print, a deep navy whale print, and a sandy beach scene, and wonder why it looks like three different holidays stitched together. The fix is to commit to one colour thread before you buy anything.
You have three sensible routes:
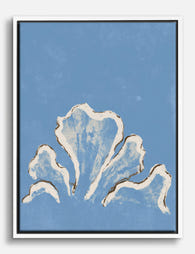
The all-blue route. Every print sits within a blue spectrum, from pale sea-glass to deep ink. Subjects can vary (whales, jellyfish, octopus, mackerel) but the water and background tones stay disciplined. This is the most foolproof option for coastal sea life wall art and gives you the calmest result.
The warm-cool contrast route. Mostly blue prints with one or two warm-toned pieces (coral, a clownfish, a rust-red lobster) acting as accents. The rule: warm pieces should be a minority, roughly one in four. More than that and your palette starts to fight itself.
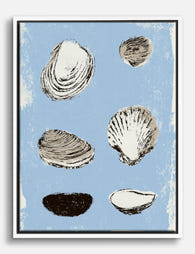
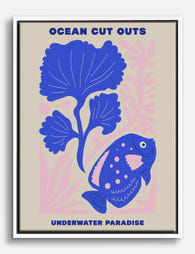
The neutral background route. Every print sits on a cream, off-white, or pale sand background, with the marine subject doing all the colour work. This is the most editorial-feeling option and pairs beautifully with vintage scientific illustration. It also suits homes that already have a lot going on elsewhere.
Pick one route and stick with it. The most common mistake is buying prints individually, falling in love with each, and only realising at hanging stage that they don't speak the same language.
The best layout for 3, 4, or 5 ocean prints
Floor-arrange first, hang second. Lay everything out on the floor or a bed, photograph it from directly above, and live with the photo for a day before committing. That said, here are the layouts that consistently work for marine subjects.
Three prints
The cleanest three-print arrangement is a horizontal row of equal-sized prints, ideally 40x50cm or 50x70cm, with 5cm of breathing room between each. This works above a sofa, a console, or a bed. Hang the centres of all three at exactly the same height.
If you want more drama, try one large central piece (say 70x100cm) flanked by two smaller portrait prints (30x40cm) on either side. The big print becomes the hero. Use this when you have one show-stopping subject like a breaching whale.
Four prints
A 2x2 grid is the most architectural option. All four prints the same size, equal spacing of 4 to 5cm between them on all sides. This works brilliantly for a set of four jellyfish, four shells, or four scientific illustrations of different fish. The repetition is the point.
If you prefer asymmetry, try one large piece on the left (60x80cm) with three smaller prints stacked or arranged to its right. The large piece anchors, the smaller ones create rhythm.
Five prints
Five is where things get interesting. The most reliable layout is one large central print (70x100cm) with two smaller prints on each side, arranged in a loose horizontal band. Vary the heights of the outer prints slightly so they don't read as a strict line.
Alternatively, a salon-style cluster works for five if you commit to it: one hero piece, four smaller pieces orbiting it, with consistent spacing of around 5cm throughout. This suits a stairwell, a hallway, or a dining wall.

Mixing sizes without it looking chaotic
Visual weight is the concept to grasp here. A 50x70cm print of a blue whale fills the eye more than a 50x70cm print of a single seahorse, even though the frames are identical. Marine subjects have very different inherent weights, and your layout needs to account for that.
A few working rules:
Heavy subjects go big or central. Whales, sharks, octopuses, and dense coral reefs have visual mass. Put them in your largest frame or at the centre of your composition.
Light subjects can go small without disappearing. Seahorses, individual shells, jellyfish, and minimalist line drawings hold their own at 30x40cm or even smaller.
Avoid mid-size monotony. Three or four prints all at 40x50cm tends to feel flat. Introduce one piece that's noticeably larger, ideally one and a half to two times the size of the others. This is where large sea life wall art ideas earn their keep: a single 70x100cm piece transforms a row of smaller prints from pleasant to considered.
Match orientation to subject. A horizontal whale print needs a horizontal frame. A vertical jellyfish print needs a portrait frame. Don't crop a subject's natural shape just to fit a layout.
The subject pairing question
Some marine subjects pair beautifully. Others fight. The shorthand:
- Jellyfish and octopus: compatible. Both have soft, flowing movement.
- Whales and other whales: compatible. Repetition reads as a series.
- Coral and shells: compatible. Both are still-life subjects with similar visual logic.
- Sharks and seahorses: incompatible. The energy mismatch is jarring.
- Tropical reef scenes and deep ocean subjects: usually incompatible. The water colours clash.
- Vintage scientific illustration and modern watercolour: can work, but only if backgrounds match (typically cream or white).
The simplest rule: if the prints could plausibly belong to the same illustrated book or expedition, they'll work together. If one feels like Caribbean snorkelling and the other feels like a North Atlantic documentary, they won't.
One frame finish to rule them all: our recommendation
We'll commit where most guides won't: natural oak. Across hundreds of marine life arrangements we've seen come together, oak does more work than any other finish.
Here's why. Oak is warm enough to balance the inherent coolness of blue-heavy palettes, but neutral enough not to compete with the artwork. White frames can wash out pale marine subjects and make the wall feel clinical. Black frames add weight that overwhelms delicate subjects like seahorses or watercolour shells. Driftwood and limed finishes lean heavily into a literal coastal aesthetic that dates quickly.
Oak just sits there and lets the art do the work. It also references the natural world without being themed.
The non-negotiable rule: every frame on the wall must match. Same finish, same profile, same width. Mixing finishes is the single fastest way to make a gallery wall look uncoordinated, and it's the mistake most often made by people buying prints from different sources. This is one reason buying wall art sets from a single source matters: you know the frames will be identical.
If oak isn't your room, the next best options are matte black (for high-contrast modern interiors) or warm white (for very minimal, Scandinavian-leaning rooms). Avoid anything ornate, anything gold, and anything that calls itself "weathered."
A note on framing quality, since it's where most gallery walls fall apart: prints and frames should arrive together, properly fitted, with no gaps or warping. Buying the print in one place and the frame in another almost always ends in misalignment. Our framed prints arrive ready to hang with fixtures attached and acrylic glaze rather than glass, which means no glare across the wall and no risk of breakage when you're inevitably rearranging.

Spacing, alignment, and hanging tips for a clean result
The single most common spacing mistake is too much air between frames. People hang prints 10 to 15cm apart and end up with a wall of disconnected islands rather than a composition.
The right spacing is 4 to 6cm between frames. That's roughly two fingers' width. Closer, and the wall feels cluttered. Further, and the eye stops reading the prints as a group.
For alignment, pick one rule and apply it ruthlessly:
- Top-aligned: all frames share the same top edge. Best for prints of varying heights.
- Centre-aligned: all frames share a horizontal centreline. Best for a row of mixed sizes.
- Grid-aligned: all frames share both top and side edges. Best for matching-size prints.
Mixing alignment rules within one wall is what creates the "random" look people are trying to avoid.
Hanging height
The centre of your gallery wall (not the top, the centre) should sit at roughly 145 to 150cm from the floor. This is gallery standard and works for most ceiling heights. Above a sofa, leave 15 to 20cm between the top of the sofa back and the bottom of the lowest frame. Above a console or sideboard, 20 to 25cm.
Practical hanging method
Cut paper templates the exact size of each frame. Tape them to the wall with masking tape. Live with the arrangement for at least 24 hours, ideally a few days. Adjust until your eye stops snagging on anything. Only then put nails in walls.
Mark hanging points through the paper, remove the templates, and hang. This method takes longer but eliminates the "I've put fourteen holes in the wall" problem entirely.
Starter combinations: three sea life print sets we love
If you're starting from zero, these combinations are tested and reliable.
The classic trio (3 prints, all 50x70cm)
A humpback whale, a giant Pacific octopus, and a school of mackerel. All on white or cream backgrounds, all in oak frames, hung in a horizontal row with 5cm spacing. Calm, considered, and works in almost any room. This is the safest entry point for marine life prints and the easiest to add to later.
The vintage scientific wall (4 prints, 2x2 grid, all 40x50cm)
Four detailed illustrations in the style of historic naturalist plates: a jellyfish study, a coral specimen, a shell collection, and a fish anatomy print. Cream backgrounds, oak frames, tight 4cm spacing. This works exceptionally well in studies, dining rooms, and hallways, and reads as collected rather than purchased.
The hero-and-supporting-cast (5 prints, mixed sizes)
One central 70x100cm print of a blue whale or breaching humpback. Two 30x40cm prints on each side: a seahorse, a piece of coral, a jellyfish, and a small shoal. Centre-aligned horizontally, 5cm spacing throughout. This is the most ambitious of the three and the most rewarding when it lands.
For each combination, the principles are the same: one colour thread, one frame finish, considered spacing, and clear visual hierarchy.

A final note before you buy
The biggest predictor of whether your gallery wall will look curated isn't budget or taste. It's restraint at the buying stage. Pick your colour thread, pick your frame finish, sketch your layout, and only then start choosing subjects. If a print you love doesn't fit the rules you've set, save it for another wall in another room. Mixing it in will undo the work the rest of the prints are doing.
A good sea life gallery wall doesn't shout. It looks like someone who genuinely loves the ocean made specific, confident choices. Your job is to make those choices once, properly, before anything goes in a basket.

In diesem Blog vorgestellte Fab-Produkte
-

Leinwandbild Muschelmotiv in Ozeanblau – Seaside Shells Collection
Translation missing: de.products.product.sale_price Ab €64,95€92,95 -

Poster Muschelstudie – Maritimes Küstenmotiv
Translation missing: de.products.product.sale_price Ab €16,95€23,95 -

Poster Jakobsmuschel-Collage im Papierschnitt
Translation missing: de.products.product.sale_price Ab €16,95€23,95 -

Poster Muschelsammlung von Ernst Haeckel
Translation missing: de.products.product.sale_price Ab €16,95€23,95 -

Poster Muschelsammlung in Blau
Translation missing: de.products.product.sale_price Ab €16,95€23,95 -

Leinwandbild Haeckels lebendige Meereswelt
Translation missing: de.products.product.sale_price Ab €64,95€92,95 -

Leinwandbild Haeckels Meereswunder
Translation missing: de.products.product.sale_price Ab €64,95€92,95 -

Poster Haeckel Meeresbotanik
Translation missing: de.products.product.sale_price Ab €16,95€23,95 -

Poster Muschelmotiv in Blau
Translation missing: de.products.product.sale_price Ab €16,95€23,95 -

Poster Muscheln auf Blau – Maritimes Küstenmotiv
Translation missing: de.products.product.sale_price Ab €16,95€23,95 -

Leinwandbild Haeckel Muschelsammlung
Translation missing: de.products.product.sale_price Ab €64,95€92,95 -

Leinwandbild Quallenstudie von Ernst Haeckel
Translation missing: de.products.product.sale_price Ab €64,95€92,95 -

Leinwandbild Abstrakter Muschelwirbel mit Küstenflair
Translation missing: de.products.product.sale_price Ab €64,95€92,95 -

Leinwandbild Weiße Korallen am Meer in Beige
Translation missing: de.products.product.sale_price Ab €64,95€92,95 -

Leinwandbild Sanfter Fischschwarm in Aquarell
Translation missing: de.products.product.sale_price Ab €64,95€92,95 -
Leinwandbild Muschelstudie in Blau – maritimer Stil
Translation missing: de.products.product.sale_price Ab €64,95€92,95 -
Leinwandbild Unterwasser-Collage mit Fisch
Translation missing: de.products.product.sale_price Ab €64,95€92,95 -
Leinwandbild Blaue Muscheln
Translation missing: de.products.product.sale_price Ab €64,95€92,95 -

Leinwandbild Muschelzauber
Translation missing: de.products.product.sale_price Ab €64,95€92,95


Mehr aus The Frame

How to Build a Calming Gallery Wall That Actual...
Most gallery walls promise serenity and deliver visual static. The fix isn't softer colours or gentler subjects, it's restraint, repetition, and a few specific measurements that almost nobody gets right....

How to Build a French-Themed Gallery Wall That ...
A French-themed gallery wall sits on a knife edge. Done well, it reads like a well-travelled friend's flat in the 6th arrondissement. Done badly, it looks like the back wall...

How to Build a Meadow-Themed Gallery Wall That ...
Gallery walls intimidate people because they require dozens of small decisions to land right. Meadow art quietly removes most of those decisions for you, because the colour palette and mood...