How to Build a Coastal Gallery Wall That Actually Looks Curated
The execution-focused guide to gallery walls that look collected over years, not ordered in one checkout.

Most coastal gallery walls fail for the same reason: they look bought, not built. This guide gives you the layout templates, exact measurements, and aesthetic rules to create a wall that feels like it came together over years of slow collecting.
The golden rule: a gallery wall needs a colour thread, not a theme
A "theme" is what makes a coastal wall look like a beach motel. Six framed seashells, a rope, a starfish print, a sign that says "the beach is calling." It reads as costume, not interior.
A colour thread is different. It's a palette that runs quietly through every piece, even when the subjects have nothing in common. A coastal colour thread is usually some combination of soft blues (think dusty denim, pale seafoam, deep navy), warm neutrals (sand, oat, bone), and one accent that anchors the lot (terracotta, ochre, or a deep blackish-green works beautifully).
Once you've got that thread, you can hang a botanical, an abstract, a black and white photograph and a stormy seascape next to each other and they'll feel like family. The eye reads the colour relationship long before it reads the subject matter.
The test: squint at your finished wall. If you can still see a unified palette through your eyelashes, you've nailed it. If you see chaos, the thread is broken somewhere.
Choosing your anchor piece
Every gallery wall needs one piece that's clearly the boss. Without an anchor, your eye has nowhere to land and the whole arrangement reads as visual noise.
For a coastal wall, the anchor is almost always a landscape. A wide horizon shot, a moody seascape, a stretch of dunes at golden hour. Something with depth and a strong horizontal line. We'd recommend going to 70x100cm if you've got the wall for it, or 60x80cm in a smaller room. Anything under 50x70cm will feel like a peer to the surrounding pieces rather than a leader.
Browse coastal landscape art prints and pick the one piece you'd happily hang on its own. That's your anchor. Everything else is supporting cast.
A few rules for anchor selection:
- The anchor should contain most of the colours in your thread. It's the piece that teaches the eye what to look for.
- Avoid putting your most detailed, busy image as the anchor. A calmer composition gives the surrounding pieces room to breathe.
- Position the anchor slightly off-centre in your final arrangement. Dead centre feels staged.

Mixing subjects: botanicals, abstracts, and coastal photography together
This is where most people get nervous. They've been told to "mix it up" but they're not sure what mixes. Here's the formula that consistently works for a coastal wall:
One large coastal landscape (the anchor). Sets the mood and the palette.
Two or three botanicals. Pressed seaweed, palm fronds, dune grasses, eucalyptus. Botanicals soften the maritime feel and stop the wall from tipping into nautical cliché. Browse botanical art prints and look for ones that share at least one colour with your anchor.
One or two abstracts. This is the secret weapon. A loose watercolour wash, a textural piece in sandy neutrals, a quiet geometric in faded indigo. Abstracts give the eye a rest between representational images and add the "collected over time" quality. Our abstract art prints collection has plenty that read as coastal without showing a single wave.
Optional: one black and white photograph. A figure on a beach, a lone boat, a textural close-up of sand or rock. Black and white acts as a visual palate cleanser and adds gravitas.
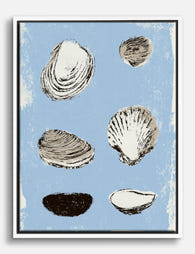
What to leave out: anything literal. No anchors, no rope motifs, no nautical flags, no shells in shadow boxes, no driftwood letters spelling BEACH. The whole point is to evoke the coast, not illustrate it.
Frame consistency: why matching frames beats eclectic every time
The internet will tell you to mix frame styles for an "eclectic, collected" look. The internet is wrong, particularly for coastal.
Here's why matching frames work harder for this style: coastal palettes are inherently soft and tonal. When the colours are gentle, you need structure somewhere. Consistent framing provides that structure. Mixed frames in a coastal palette read as messy because there's nothing else firm enough to hold the composition together.
Our recommendation: pick one frame finish and stick with it across every piece. The two that work best for coastal are:
- Natural oak. Warm, light, reads as driftwood without being literal. Our go-to for sun-bleached, Mediterranean, Hamptons-style schemes.
- Matte black. Sharper, more graphic, brilliant for moody Atlantic or Cornish coastal palettes with deeper blues and greys.
White frames can work but they often disappear against a white wall, which kills the structure you're trying to create. If your walls are coloured (sage, putty, soft blue), white framing comes alive.
A note on what you actually get when you order framed prints: the frame and print should arrive together in one box, properly fitted, with hanging fixtures attached. The most common gallery wall disaster is buying frames separately, finding they don't quite fit the prints, and ending up with warped paper or visible gaps. Get them framed properly the first time and you skip the entire problem.
Layout templates that work
Three layouts. Pick one. Don't try to invent your own.
The grid
Equal-sized prints arranged in a perfect rectangle. Three across by two down is the classic. All frames identical, all spacing identical, usually 5cm between each frame.
The grid is the most forgiving layout because the structure does the heavy lifting. It works brilliantly above a sofa or bed, and it's the only layout where you can get away with quite varied subject matter, because the rigid format unifies everything visually.
Best for: bedrooms, above sofas, anyone nervous about freestyling.
The salon hang
The dense, asymmetric, gallery-style arrangement. Anchor piece slightly off-centre, with smaller pieces clustered around it in varied orientations. Spacing is tight, usually 4 to 6cm between frames.
This is the layout that looks "collected over time" when done right. The trick is to make it look effortless while actually planning every piece carefully. Mix portrait and landscape orientations. Vary the sizes significantly (a 70x100cm next to a 30x40cm reads as confident; a 70x100cm next to a 60x80cm reads as indecisive).
Best for: living room feature walls, dining rooms, large hallways.
The linear row
A single horizontal line of three to five prints, all hung at the same centre height. Frames can be the same size or vary slightly. Spacing between frames should be 6 to 10cm, more generous than other layouts because the row needs breathing room.
Often overlooked but it's the most architectural option. Works beautifully above a console table, along a hallway, or stretched across a long wall above a bench.
Best for: hallways, above sideboards, narrow walls.

Specific size combinations we recommend
Theory is easy. Picking actual sizes is what stalls people. Here are combinations that work, with measurements.
Above a 3-seater sofa (around 200cm wide)
Salon hang option:
- 1 anchor at 70x100cm (portrait)
- 2 supporting pieces at 50x70cm
- 3 smaller pieces at 30x40cm
- Total wall area used: roughly 180cm wide x 130cm tall
Grid option:
- 6 prints at 40x50cm in a 3x2 grid
- 5cm spacing between each
- Total wall area: 130cm wide x 110cm tall
Above a console table or sideboard (around 120cm wide)
Linear row:
- 3 prints at 40x50cm, all portrait
- 8cm spacing
- Total wall area: 136cm wide x 50cm tall
A feature wall (full height, 200cm+ wide)
Statement salon hang:
- 1 anchor at 100x70cm landscape
- 1 supporting at 70x50cm
- 4 supporting at 50x40cm
- 2 smaller at 30x30cm
If choosing fixed combinations feels paralysing, our wall art sets are pre-sized to work together, which gets you past the maths and into the hanging.
Stairwell
Stairs are the exception to most rules. Sizes should reduce as you climb (largest at the bottom, smallest at the top), and prints should follow the angle of the stair line rather than sit horizontally. Three to five prints at 40x50cm or 50x70cm, spaced 8 to 10cm apart on the diagonal.
How to lay it out before you drill a single hole
This is the step that prevents disaster. Skip it and you will regret it.
1. Lay everything on the floor first. Clear a space the same dimensions as your wall. Arrange the prints flat, exactly as you want them on the wall. Move them around. Photograph the layout from above. Adjust until you stop wanting to adjust.
2. Cut paper templates. Take brown paper, newspaper, or old wrapping paper and cut a rectangle the exact size of each frame. Write the print name and which way is up on each template.
3. Tape the templates to the wall. Use low-tack masking tape. Recreate your floor layout on the wall. Stand back. Live with it for a day if you can. This is when you discover the anchor is too high, or the spacing on the left feels cramped.
4. Mark the hanging point on each template. Measure where the picture hook needs to go (usually around 5 to 8cm down from the top of the frame for most fixtures). Mark this through the paper directly onto the wall.
5. Hammer through the paper. Drive your nail or screw through the marked point on the template. Tear the paper away. Hang the frame.
This method removes every variable that causes gallery wall anxiety. You're not committing to anything until the very last step, and even then, you've already seen exactly how it'll look.
A quick word on hang height: the centre of your overall arrangement should sit at around 145 to 150cm from the floor. Above furniture, leave 15 to 25cm of breathing space between the top of the sofa or sideboard and the bottom of your lowest frame.

Where to hang a coastal gallery wall
The living room is the obvious answer, but it's not always the best one. Some of the most successful coastal walls live in less expected places.
Hallways
A long hallway is gallery wall heaven. The linear row layout suits the space perfectly, and you get the joy of walking past the wall multiple times a day rather than only seeing it from one angle. Coastal subjects work especially well here because hallways are often light-starved, and a sequence of bright seascapes can transform a dim corridor.
Staircases
Following the rise of a staircase is one of the most architecturally satisfying ways to display art. The diagonal sightline naturally guides the eye up, and the changing perspective as you climb means you notice different details each time.
Bathrooms
Underrated and underused. A small coastal gallery in a bathroom is one of the most pleasant things you can do to a space. Canvas works particularly well here because of the moisture; the poly-cotton handles humidity better than paper. UV-protective acrylic glazing on framed prints also helps protect against the inevitable splashes and steam.
Bedrooms
Above the bed is the classic spot, but consider the wall opposite the bed instead. It's the first thing you see when you wake up, and a calm coastal scene is a better view than the back of a door.
Dining rooms
A salon hang in a dining room creates the warmth and density that the room often lacks. Coastal palettes pair beautifully with linen, ceramics, and natural wood, all of which tend to live in dining spaces anyway.

The final test
Before you commit, ask yourself one question: does this wall look like it was bought in a single afternoon, or does it look like it was assembled over years?
If it's the first, you've got too much symmetry, frames that are all the same size, or a palette that's too tightly matched. Vary one print to a slightly larger size. Switch one piece from landscape to portrait. Add one slightly unexpected colour that still sits within your thread.
If it's the second, you're done. Stop fiddling. Pour a drink and admire it.

In diesem Blog vorgestellte Fab-Produkte
-

Leinwandbild Küstenwellen mit Spruch
Translation missing: de.products.product.sale_price Ab €64,95€107,95 -

Poster Muschelstudie – Maritimes Küstenmotiv
Translation missing: de.products.product.sale_price Ab €17,95€29,95 -
Leinwandbild Muschelstudie in Blau – maritimer Stil
Translation missing: de.products.product.sale_price Ab €64,95€107,95 -

Poster Muschelmotiv in Blau
Translation missing: de.products.product.sale_price Ab €17,95€29,95 -

Leinwandbild Sanfte Meereswellen in Blau & Sandbeige
Translation missing: de.products.product.sale_price Ab €64,95€107,95 -

Leinwandbild Abstrakter Muschelwirbel mit Küstenflair
Translation missing: de.products.product.sale_price Ab €64,95€107,95 -

Poster Muscheln auf Blau – Maritimes Küstenmotiv
Translation missing: de.products.product.sale_price Ab €17,95€29,95 -

Leinwandbild sanfte Wellen am Meer
Translation missing: de.products.product.sale_price Ab €64,95€107,95 -

Leinwandbild Surfbrett-Reihe in sanften Strandtönen
Translation missing: de.products.product.sale_price Ab €64,95€107,95 -

Poster Maritimes Muschelmotiv in Beige und Blau
Translation missing: de.products.product.sale_price Ab €17,95€29,95 -

Leinwandbild Fensterblick auf den Strand mit Palmen
Translation missing: de.products.product.sale_price Ab €64,95€107,95 -

Poster Sanfte Küstenwellen in Blau und Sand
Translation missing: de.products.product.sale_price Ab €17,95€29,95 -

Leinwandbild Küstenruhe – Marineblau und Weiß
Translation missing: de.products.product.sale_price Ab €64,95€107,95 -

Leinwandbild Küstenklippe von Seurat
Translation missing: de.products.product.sale_price Ab €64,95€92,95 -

Leinwandbild Sanfte Meereswellen – Ruhige Küste in Blau
Translation missing: de.products.product.sale_price Ab €64,95€107,95 -

Leinwandbild Mediterraner Strandtraum
Translation missing: de.products.product.sale_price Ab €64,95€107,95 -

Leinwandbild Küstenlandschaft mit Dünen und sattem Grün
Translation missing: de.products.product.sale_price Ab €64,95€107,95 -

Leinwandbild Küstenpfad mit Weitblick
Translation missing: de.products.product.sale_price Ab €64,95€107,95


Mehr aus The Frame

Every Animal in William Morris's Designs: The C...
Most people know the thrush in Strawberry Thief and stop there. But Morris's wider body of work contains foxes, hares, peacocks, ravens, lions, herons, woodpeckers, deer, and doves, often half-buried...

Countryside Decor Ideas: How to Bring Rural Cal...
Countryside art has quietly become one of the most versatile choices in modern interiors. Not the chintz-and-bunting version, but the kind of soft, considered pastoral scenes that bring the outside...

Arts and Crafts Animal Prints: The Victorian De...
The Arts and Crafts revival: why Victorian animal prints are trending again Scroll through any interior design hashtag right now and you'll see them everywhere: hares peering through curling foliage,...