Curated or Collected? Creating Your Equestrian Gallery Wall
A step-by-step process for building a horse art display that looks designed, not dumped on the wall.

There is a fine line between a gallery wall that reads as considered and one that reads as a horse-mad teenager's bedroom. The difference is not how much you spend or how many pieces you hang. It comes down to a process: anchor, edit, measure, hang.
Gallery wall vs single statement piece: which approach suits your space
Before you start collecting prints, decide what your wall actually wants. A single statement piece works best when you have one clean, uninterrupted wall (above a sofa, behind a bed, at the end of a hallway) and you want a quiet, confident moment. One large 70x100cm framed horse portrait above a sideboard does more work than five smaller pieces fighting each other.
A gallery wall earns its keep when you have an architectural feature to negotiate around (a staircase, a chimney breast with awkward proportions, a long hallway) or when you want to tell a richer story. Galleries also let you mix subjects, which matters if your goal is to feature horses without the entire room becoming a tribute to them.
Our rule of thumb: if your wall is under 1.5 metres wide, go single. If it is between 1.5 and 2.5 metres, you can do either, and a gallery of 3 to 5 pieces tends to feel more interesting. Anything over 2.5 metres rewards a proper gallery of 5 to 9 pieces.

Start with a hero: choosing your anchor horse print
Every good gallery wall has one piece doing the heavy lifting. This is your hero, and the rest of the wall exists to support it. Pick this first, before you buy anything else.
A good anchor horse print has three qualities. It is large enough to hold the wall on its own (think 50x70cm minimum, 70x100cm if your wall is generous). It has a clear focal point, usually a portrait or strong silhouette rather than a busy scene. And its dominant colours give you a palette to build the rest of the gallery from.
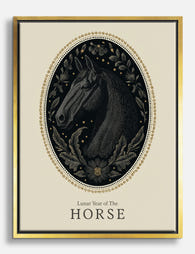
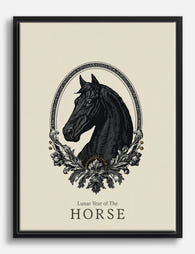
We tend to steer people towards moody, low-contrast horse portraits as anchors. A close-up dressage portrait in soft greys, a chestnut head against a warm cream background, a black horse against deep green. These read as art rather than illustration, and they give you neutral, repeatable colours (charcoal, sage, terracotta, oat) to thread through the supporting pieces.
Browse horse art prints with this in mind: not "which one do I like most" but "which one could anchor a wall." They are different questions.
Mixing horse art with other subjects
Here is the dilemma most equestrian decorators run into. You love horses. You also do not want every wall in your house to announce that fact. The answer is dilution, done deliberately.
Our preferred ratio for a gallery is roughly 40 to 60 percent horse art and the rest in complementary subjects. So in a 5-piece gallery, two or three horse prints and the rest split between landscapes, botanicals, or abstract work. This keeps the equestrian theme as the thesis rather than the entire essay.
Landscapes are the most natural pairing. Rolling countryside, misty fields, hedgerows, moorland. They share the same world your horse prints live in, so the eye accepts them as part of the same story. Landscape prints in muted greens and stone tones sit beautifully alongside horse portraits without competing.
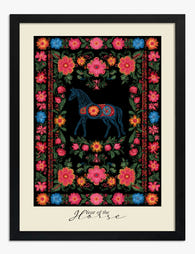
Botanicals add softness and break up the figurative weight of horse imagery. Pressed-flower style prints, single-stem studies, or vintage botanical illustrations work particularly well because they tend to share the warm cream and soft sage palette that horse art often inhabits. Pull from botanical art prints when you want to lighten a gallery that feels too heavy or too brown.
Abstract pieces are the wildcard. A single abstract in your accent colour can act as a visual breath between two more detailed pieces. Use sparingly: one abstract in a 5-piece gallery, two in a 7-piece, never more.
What does not work: wildlife (too thematically close, fights for attention), vintage maps (too busy alongside horse imagery), bold typography (clashes with the quiet drama of equestrian art). Avoid these.
Frame consistency: why matching frame finish matters more than matching sizes
This is the single most important thing in this article. If you take nothing else away, take this.
You do not need your frames to be the same size. You do need them to be the same finish. A gallery of mixed sizes in matching black frames reads as curated. A gallery of identical sizes in mismatched finishes (one oak, one black, one white) reads as chaotic, no matter how good the prints are.
Pick one frame finish for the whole wall and commit. Our recommendations:
- Natural oak: warm, calm, works in most rooms. Default choice if you are unsure.
- Black: graphic and gallery-like, makes colours pop, best for modern interiors.
- White: airy and soft, best in bright rooms with pale walls.
We avoid mixing finishes within a single gallery. If you absolutely must (because you already own pieces in different frames), use mat boards in a consistent colour to create unity instead. A 5cm cream mat around every print, regardless of frame, will trick the eye into reading the wall as cohesive.
Our framed prints come with FSC-certified solid wood frames and UV-protective acrylic glaze rather than glass, which matters for two reasons. First, the acrylic does not blow out highlights with reflections, so detail in your horse portrait stays visible. Second, the frame and print arrive fitted together in one box, so you avoid the classic gallery wall disaster of buying frames separately and finding the print sits crooked or the backing warps within a fortnight.

Three proven gallery wall layouts for horse art
The Grid
Two rows of three, or three rows of three. All prints the same size, evenly spaced, frames matching. The most formal, most graphic option. Best for modern rooms, hallways, and above long sofas.
For a 6-piece grid in 30x40cm prints with 5cm spacing, your total wall coverage is roughly 95cm tall by 145cm wide. For a 9-piece grid in the same size, you need 145cm by 145cm. Measure twice.
The grid suits horse art when you want a typological feel: six horse portraits in slightly different poses, or a mix of horses, landscapes and botanicals all shot in the same tonal range.
The Salon
Asymmetrical, layered, looks collected over time. Mixes 3 to 4 different print sizes around a central anchor. The hardest to plan, the most rewarding when it works.
A classic salon layout for horse art: one 50x70cm anchor print slightly left of centre, two 30x40cm prints stacked to its right, one 40x50cm landscape above and slightly left of the anchor, two 21x30cm botanicals filling the bottom right. Total spread roughly 130cm wide by 110cm tall.
The trick with salon layouts is treating the outer edges of the cluster as a soft rectangle. Your prints can sit at different positions inside that rectangle, but the overall silhouette should feel intentional. Odd numbers (3, 5, 7) almost always look better than even.
The Linear
A single horizontal row of 3 to 5 prints, all aligned to a centre line, evenly spaced. The easiest to plan, the most forgiving on uneven walls, and arguably the most elegant above a sofa or sideboard.
For three 40x50cm prints in a line with 5cm gaps, you need 130cm of horizontal space. For five of the same prints, 230cm. Hang the centre line of the row at 145cm from the floor and you cannot go wrong.
Linear works particularly well when you want to mix subjects without committing to the visual complexity of a salon wall. Try: landscape, horse portrait, botanical, horse portrait, landscape. The horses anchor, the others breathe.
Sizing and spacing: the measurements that actually work on a real wall
A few numbers worth memorising.
Wall art width should be 60 to 75 percent of the furniture below it. A 200cm sofa wants a gallery (or single piece) between 120cm and 150cm wide. Narrower than that and the art looks marooned. Wider and it overwhelms.
Hang the centre of your gallery at 145cm to 152cm from the floor. This is roughly eye level for the average adult standing. For a gallery with multiple pieces, the centre line of the entire arrangement (not each individual print) should sit in this range.
Leave 15 to 20cm of breathing room between the bottom of the lowest frame and the top of any furniture below. Closer than that and the art feels stuck to the sofa. Further away and it floats off into the wall.
Spacing between frames should be 5 to 8cm. Closer (5cm) reads as a single composition. Further (8cm) reads as separate pieces in a group. Pick one and apply it consistently across the whole wall. Inconsistent spacing is the thing that makes a gallery look amateur.
Colour cohesion: building a palette across multiple prints
The fastest way to make a mixed gallery feel curated is to limit yourself to a 3-colour palette and repeat it across every piece.
Identify your anchor's two or three dominant colours. A misty grey horse portrait might give you charcoal, soft white, and a hint of sage in the background foliage. Now hunt for supporting prints that share at least one of those colours. A landscape with sage hills. A botanical with charcoal stems on cream. An abstract in white and grey.
You do not need every print to contain every colour. You need every print to contain at least one of your three colours. That single repeated colour acts as a thread, and the eye picks it up across the wall.
Three palettes that work especially well with horse art:
- Earthy classic: charcoal, oat, terracotta
- English countryside: sage green, soft cream, warm grey
- Modern equestrian: black, white, deep oxblood
If you find a print you love that breaks your palette, do not buy it for this wall. Save it for somewhere else. The gallery has to come first.

How to order and hang without committing holes you regret
This is where most people go wrong. They buy prints, get excited, and start hammering nails before they have planned the layout. Then they live with crooked, badly spaced art for years because moving it means filling holes.
Do this instead.
Step 1: Plan on the floor. Once your prints arrive, lay them out on the floor in front of the wall they are going on. Push them together, pull them apart, swap positions. Spend at least 20 minutes on this. Take photos from above with your phone so you can compare arrangements.
Step 2: Make paper templates. Cut sheets of paper or newspaper to the exact size of each frame. Write the print name on each one. These are your templates.
Step 3: Tape templates to the wall. Use low-tack masking tape and stick the paper templates to the wall in your chosen arrangement. Step back. Live with it for a day if you can. Adjust spacing until it feels right.
Step 4: Mark hanging points through the paper. Once you are happy, mark the exact hanging point on each paper template (measure from the top of the frame to where the hanging fixture sits on the back). Now you can drill or hammer through the paper, knowing each hole is in exactly the right place.
Step 5: Tear away the paper and hang. Our framed prints arrive with fixtures already attached, so once your holes are correctly placed, hanging is straightforward.
This whole process takes an afternoon. It will save you a weekend of regret and a tube of polyfilla.

A starter gallery for the intimidated
If a 7-piece salon wall feels like too much, start with three. One 50x70cm horse portrait as your anchor, one 40x50cm landscape to the upper left, one 30x40cm botanical to the lower right. Frames matching, spacing 6cm, centre line 150cm from the floor.
That is a complete, considered gallery. You can always add to it later. The best walls grow over years, not weekends. If you want to skip the curation entirely, pre-curated wall art sets take the colour-matching work off your hands.
Pick your anchor first. Match your frame finish. Plan on the floor before you drill. Everything else is detail.

In diesem Blog vorgestellte Fab-Produkte
-

Leinwandbild Pferde‑Eleganz – Jahr des Pferdes
Verkaufspreis Ab £49.95£74.95 -

Leinwandbild Reitsport-Tradition – Skizzen von Zaumzeug & Wolldecken
Verkaufspreis Ab £49.95£74.95 -

Poster Reitkultur – Pferde-Studie mit Vintage-Charme
Verkaufspreis Ab £11.95£19.95 -

Poster Eleganz im Jahr des Pferdes
Verkaufspreis Ab £11.95£19.95 -
Leinwandbild Jahr des Pferdes – Elegantes Pferdeporträt
Verkaufspreis Ab £49.95£74.95 -

Poster Eleganz im Jahr des Pferdes
Verkaufspreis Ab £11.95£19.95 -

Poster Pferde-Eleganz – Jahr des Pferdes
Verkaufspreis Ab £11.95£19.95 -

Leinwandbild Jahr des Pferdes – florales Motiv
Verkaufspreis Ab £49.95£74.95 -

Leinwandbild Eleganz im Jahr des Pferdes
Verkaufspreis Ab £49.95£74.95 -

Poster Jahr des Pferdes – Elegantes Pferdeportrait
Verkaufspreis Ab £11.95£19.95 -
Leinwandbild Elegantes Pferd mit Vintage-Wappen
Verkaufspreis Ab £49.95£74.95 -

Poster Jahr des Pferdes – lunare Eleganz
Verkaufspreis Ab £11.95£19.95 -

Leinwandbild Schwarzes Pferd – Eleganz zum Jahr des Pferdes
Verkaufspreis Ab £49.95£74.95 -
Poster Jahr des Pferdes – Florales Pferdemotiv
Verkaufspreis Ab £11.95£19.95 -

Poster Pferdeporträt in Schwarz auf Beige mit floralen Details
Verkaufspreis Ab £11.95£19.95 -

Leinwandbild Florales Pferd im Tapisserie-Stil
Verkaufspreis Ab £49.95£74.95 -

Leinwandbild Jahr des Pferdes – Blaues Floralmotiv
Verkaufspreis Ab £49.95£74.95 -

Leinwandbild Jahr des Pferdes – florale Motive
Verkaufspreis Ab £49.95£74.95 -

Leinwandbild Jahr des Pferdes – Florale Harmonie
Verkaufspreis Ab £49.95£74.95 -

Poster Jahr des Pferdes im Tapisserie-Stil
Verkaufspreis Ab £11.95£19.95


Mehr aus The Frame

Tulip Art for Bedrooms: The Best Colours, Sizes...
Tulips are one of the few florals that feel equally at home in a minimalist bedroom and a maximalist one. Their soft, sculptural forms and huge colour range mean you...

William Morris Animal Designs: The Complete Sto...
Animals in William Morris's original work: what he actually designed William Morris designed a surprising number of animals, but not the ones most people assume. His original wallpapers, textiles and...

Why Vintage Fish Prints Work in Modern Homes Wh...
Vintage fish prints have quietly become one of the most useful things you can put on a wall. Not because they're trendy, but because their scientific origins make them work...