How to Frame Foil Prints Properly (and Keep Them Looking Perfect for Years)
Most foil prints lose their sparkle within a few years. Here's how to frame, hang, and care for yours so they don't.

Foil prints live or die by their framing. A regular art print can survive a mediocre frame and still look fine, but foil's reflective surface is unforgiving: bad glazing dulls the shine, cheap mounts cause yellowing within a few years, and poor lighting placement turns a sparkling piece into a flat grey rectangle. This guide covers everything we've learned about framing and caring for foil prints, whether you're buying ready-framed or planning to frame an unframed piece yourself.
Why framing matters more with foil prints than regular art
Standard giclée prints are robust. The ink sits in the paper fibres, the surface is matte, and the worst that tends to happen with cheap framing is a slow shift in colour over a decade or so. Foil prints are different.
The metallic layer is thin, applied to the surface, and physically delicate. It scratches under light pressure, creases if you bend the paper, and can tarnish if it sits against the wrong material. Worse, foil only looks like foil when light hits it from the right angle, which means framing decisions about glazing, mat depth, and even the placement of the print on the wall have an outsized effect on how the piece actually looks.
Get the framing right and a foil print holds its brilliance for decades. Get it wrong and you've essentially bought a dull silver rectangle that cost more than a regular print.

Glass vs acrylic glazing: which protects foil better
The glazing question is where most DIY framers go wrong with foil. Standard picture glass is heavy, prone to shattering, and offers minimal UV protection (around 45% blocked at best). For a reflective print, glass also adds its own surface reflections that compete with the foil's shine, often making the artwork look murky.
Acrylic glazing is the better choice for foil prints in almost every scenario. It's roughly half the weight of glass, shatter-resistant (which matters when you're handling a delicate surface), and high-quality UV-protective acrylic blocks up to 99% of UV light. That UV protection is the difference between a foil print that holds its colour for decades and one that fades visibly within five years.
There's one trade-off worth knowing about: acrylic generates static, and static attracts dust. On a foil print, dust shows up more obviously than on matte paper because every speck catches the light. The fix is straightforward. Wipe acrylic with a microfibre cloth (never paper towel, which scratches) and use an anti-static spray every few months if you're in a particularly dry environment.
The spacer rule
Foil prints should never sit pressed directly against the glazing. Over time, the foil layer can adhere to the inside of the glass or acrylic, especially in warm rooms, leaving permanent marks where the foil has lifted away from the paper. A mat or a spacer creates a small air gap that prevents this entirely. Any decent framer knows this. If you're framing a foil print yourself, do not skip it.
The problem with cheap frames (warping, bubbling, and damage to foil)
Cheap framing causes three specific problems for foil prints, and all three are largely invisible when you first hang the piece.
The first is acid damage. MDF backing boards, non-archival mats, and standard cardboard release acids slowly into the print over time. On regular art this shows up as yellowing around the edges. On foil prints, the same acids can tarnish the metallic layer, leaving cloudy patches that you can't clean off. This typically becomes visible between two and five years in, which is roughly the point at which most people have forgotten where they bought the frame and have no recourse.
The second is warping. Frames built from MDF or thin veneers respond to humidity by bowing slightly, and when the frame bows, the print bows with it. On a matte print this looks like a gentle ripple. On a foil print, the bowing creates micro-creases in the foil layer that catch light unevenly, killing the smooth reflective finish that makes foil worth buying in the first place.
The third is shipping damage. When a frame is shipped separately from the print and you assemble it at home, you handle the foil surface multiple times. Fingerprints, dust, and small scratches accumulate during that process, and on foil they're visible from across the room.
This is why we make our framed art prints using solid FSC-certified wood, with no MDF or veneers anywhere in the construction, and acid-free archival backing as standard.

Why we ship framed foil prints ready to hang in one box
Most of the framing problems we've described come from one structural issue in the industry: prints and frames are usually shipped separately, then assembled by the customer or a local framer who hasn't worked with foil before.
We do it differently. The print and frame are fitted together at our facility, in controlled conditions, by people who handle foil every day. The whole thing arrives in one box, with fixtures already attached, ready to hang. No fingerprints on the foil. No assembly. No risk of pressing the print against the glazing or skipping the spacer.
Our frames use UV-protective acrylic glazing rather than glass, which protects the foil from fading and means the package is light enough to hang on a single picture hook without reinforcement. The acrylic also won't shatter if the parcel takes a knock in transit, which on a foil print is the difference between a piece that arrives perfect and one that arrives unsalvageable.
If you've been burned by poor framing in the past, this is the part that matters most. The framing is the hard part of owning a foil print. We've taken it off your plate.
Hanging foil prints: placement tips for catching the right light
Foil prints need the right light to do their job. A regular print looks the same in dim light or bright light. A foil print can look stunning in one position and almost invisible in another, three metres away.
The general rule: foil prints want indirect, ambient light hitting them at an angle, not direct flat lighting from straight ahead. Three placements work particularly well.
Opposite a window. Natural light bouncing off the print across the room creates that subtle shimmer foil is known for. Avoid hanging the print on the same wall as a window, where it sits in shadow most of the day.
Under or near a directional light. A picture light, a downlight from the ceiling, or a tall floor lamp positioned slightly to one side will animate the foil at any time of day. Overhead lighting at roughly a 30-degree angle is what most galleries use for reflective work, and it's the easiest setup to replicate at home.
In a hallway with mixed lighting. Hallways often have lighting from multiple directions, which catches different parts of the foil as you walk past. This is one of the few spots where foil consistently outperforms a regular print.
Avoid bathrooms and kitchens entirely. Humidity is the long-term enemy of foil adhesion, and steam plus heat will lift the metallic layer from the paper within a couple of years. If you want art in a bathroom, choose canvas or a matte print rather than foil.

Cleaning and maintaining foil art over time
Foil prints need slightly more careful cleaning than regular art, but the routine is simple once you know it.
For the glazing, use a dry microfibre cloth in gentle circular motions. If there are smudges that won't come off dry, dampen the cloth lightly with water (not glass cleaner, which can streak acrylic and damage the surface over years of use). Never spray liquid directly onto the frame. Spray onto the cloth, then wipe.
For the frame itself, a dry cloth is almost always enough. Solid wood frames need very little maintenance. Avoid furniture polish, which leaves residue that attracts dust.
For static, an anti-static spray applied to the cloth (never the print) once every few months keeps dust at bay. You can also reduce static by keeping room humidity above 40% in winter, which is when most static issues appear.
You should never need to clean the foil itself if the framing is done properly, because the foil is sealed behind the glazing. If you're handling an unframed foil print, see the section below.
Do foil prints fade over time?
With proper UV-protective glazing, no, not in any meaningful way. The water-based pigment inks we use are rated to last for hundreds of years even in direct sunlight, and our acrylic blocks the UV that causes fading. Without UV protection, foil prints can show visible fading within five to ten years of direct sun exposure. This is the single most common reason for premature foil print disappointment, and it's entirely preventable with the right framing.
When to choose unframed (and how to handle foil prints safely)
There are good reasons to buy a foil print unframed. You might already own a frame you love, you might want to use a custom mat colour, or you might prefer the minimalist look of an unframed piece displayed on a shelf or in a clip frame.
If you're going unframed, handle the print like you'd handle a photograph negative. Cotton gloves are ideal, but clean dry hands work if you hold the print only by the edges. Never touch the foil surface directly. Skin oils tarnish foil over time and the marks are nearly impossible to remove.
When transporting an unframed foil print, keep it flat between two sheets of acid-free tissue or glassine. If you absolutely must roll it, roll it loosely with the foil side facing outward, never inward. Rolling foil-side-in creates compression creases that catch light permanently.
For DIY framing, look for these specifications:
- Acid-free, archival mat board (look for "lignin-free" or "conservation grade")
- A spacer or mat depth of at least 2mm between the foil and the glazing
- UV-protective acrylic, ideally 99% UV-blocking
- A solid wood frame, not MDF or composite
If you'd rather skip the hunt and have it done properly, our foil art prints are available framed to all of these specifications as standard. The full art print range follows the same archival standards whether you choose foil or matte.

A quick note on photographing foil prints
If you're sharing your foil prints on social media or trying to capture them for any reason, you'll have noticed they're notoriously difficult to photograph. The trick is the same as hanging them: light at an angle, never head-on. Move around the print with your phone until you find the position where the foil reflects light into the lens, then shoot from there. A single warm light source slightly off-axis will do more for the photo than any filter.
The short version
Buy framed if you can, because the framing is where foil prints fail. If you're framing yourself, use UV-protective acrylic, archival acid-free materials, a solid wood frame, and always include a spacer between the print and the glazing. Hang opposite a window or under directional light, never in a humid room, and clean only with a dry microfibre cloth. Done right, a foil print will hold its sparkle for decades. Done wrong, you'll be disappointed within a year.

In diesem Blog vorgestellte Fab-Produkte
-
 Goldfolie
Poster 'Chef Review' mit Goldfolie
Verkaufspreis Ab £19.95£32.95 -
 Goldfolie
Poster Minimalistisch mit Goldfolie in Beige
Verkaufspreis Ab £19.95£32.95 -
 Goldfolie
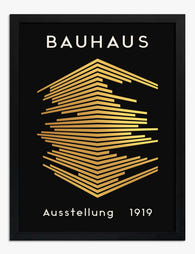
Poster Bauhaus-Eleganz mit Goldfolie
Verkaufspreis Ab £19.95£32.95 -
 Goldfolie
Poster Goldener Wald mit Goldfolie
Verkaufspreis Ab £19.95£32.95 -
 Goldfolie
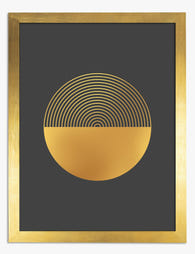
Poster mit Goldfolie – unendlicher Schimmer, geometrischer Kreis
Verkaufspreis Ab £19.95£32.95 -
 Goldfolie
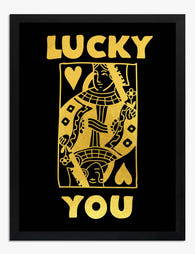
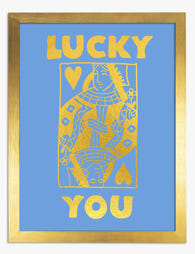
Poster Lucky Queen mit Goldfolie
Verkaufspreis Ab £19.95£32.95 -
 Goldfolie
Poster Erfüllung von Gustav Klimt mit Goldfolie
Verkaufspreis Ab £19.95£32.95 -
 Goldfolie
Poster Ins Wasser mit Goldfolie – Einzelner Schwimmer
Verkaufspreis Ab £19.95£32.95 -
 Goldfolie
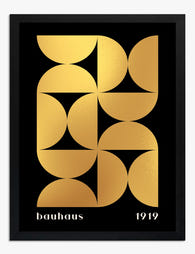
Poster Bauhaus-Geometrie mit Goldfolie
Verkaufspreis Ab £19.95£32.95 -
 Goldfolie
Poster Herzdame mit Goldfolie – Lucky Queen
Verkaufspreis Ab £19.95£32.95 -
 Goldfolie
Poster Mondphasen in Goldfolie auf Schwarz
Verkaufspreis Ab £19.95£32.95 -
 Silberfolie
Poster Unendlicher Kreis in metallischer Silberfolie
Verkaufspreis Ab £19.95£32.95 -
 Silberfolie
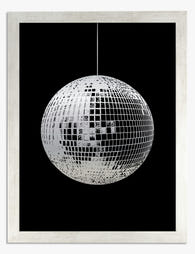
Poster Spiegelkugel mit Silberfolie
Verkaufspreis Ab £19.95£32.95 -
 Goldfolie
Poster Goldene Flut mit Goldfolie
Verkaufspreis Ab £19.95£32.95 -
 Goldfolie
Poster Ikarus mit Goldfolie von Matisse
Verkaufspreis Ab £19.95£32.95 -
 Goldfolie
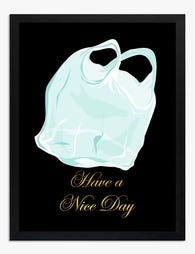
Poster Have a Nice Day in Goldfolie auf Schwarz
Verkaufspreis Ab £19.95£32.95 -
 Goldfolie
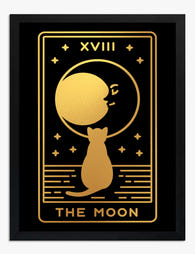
Poster Mond & Katze in Goldfolie
Verkaufspreis Ab £19.95£32.95 -
 Goldfolie
Poster Nachtwald mit Goldfolie – Mond und Sterne
Verkaufspreis Ab £19.95£32.95 -
 Goldfolie
Poster Wald im Sonnenlicht mit Goldfolie – im Stil von Klimt
Verkaufspreis Ab £19.95£32.95 -
 Goldfolie
Poster Halbmond in Goldfolie
Verkaufspreis Ab £19.95£32.95


Mehr aus The Frame

Vintage Rose Prints: From Botanical Illustratio...
Vintage rose prints are having a proper moment. Not the dusty, chintzy kind your nan had over the settee, but the considered, well-framed kind that anchor a modern room and...

Why Rose Print Decor Works Better Without the C...
Why Roses Are the One Floral That Never Truly Goes Out of Style Roses have been painted, printed and photographed for centuries, and they still turn up in the work...

Beyond the Fruit Bowl: Kitchen Wall Art Ideas T...
The kitchen is the most photographed, most lived-in room in your home, and yet it's usually decorated like an afterthought. A print of lemons here, a chalkboard-style coffee poster there,...