How to Hang Canvas Art: The Only Guide You Actually Need
Forget the dogma about eye level and decimal-perfect measurements. Here's how to actually get it right, first time.

Hanging canvas art is the kind of thing people overthink until they've done it twice. The rules exist for good reasons, but they're guidelines, not commandments, and almost any mistake is fixable with a bit of filler and ten minutes. This is the guide that tells you what to do, when to ignore the rules, and how to stop putting nails in the wrong place.

The 145cm rule (and when to break it)
The standard advice is to hang the centre of your canvas 145cm from the floor. This roughly matches average eye level and mimics how art is hung in galleries, where curators have spent decades figuring out what feels right. It's a good starting point and works in maybe 70% of situations.
Here's how to use it: measure 145cm up from the floor and put a small pencil mark on the wall. That's where the centre of your canvas should sit, not the top edge. So if your canvas is 60cm tall, the top of it will be at 175cm and the bottom at 115cm.
Break the rule when:
- Your ceilings are over 2.7m. In high-ceilinged rooms, 145cm looks oddly low. Bump the centre up to 150-160cm so the art relates to the room rather than floating awkwardly near the skirting.
- Everyone in the household is tall (or short). Eye level for a 1.9m person is not 145cm. Adjust to your actual eye level when standing.
- You're hanging above furniture. This is the big one. Eye level becomes irrelevant. The canvas needs to relate to the sofa, bed, or console below it, not to a hypothetical viewer standing in the middle of the room.
- You're doing a gallery wall. The 145cm rule applies to the centre of the whole arrangement, not each individual piece.
If you're hanging in a hallway where people walk past rather than stand and stare, you can also nudge the centre slightly higher, around 150cm. The art is being viewed in motion, and a higher placement reads better.
Hanging canvas above furniture: the two-thirds width principle
The single most common mistake we see is canvas art that's too small for the furniture beneath it. A 40x50cm canvas above a 220cm sofa looks like a postage stamp on a duvet.
The fix is the two-thirds rule: your canvas (or the total width of a multi-piece arrangement) should be roughly two-thirds the width of the furniture below it. So:
- 180cm sofa: aim for art that's around 120cm wide
- 140cm sideboard: aim for around 90-100cm wide
- 160cm bed (UK king): aim for around 105cm wide
This is where canvas comes into its own. You can go big without the weight or expense of glass-fronted framed work, which is why our large wall art collection leans heavily into canvas at sizes up to 100x150cm.
For the gap between the top of your furniture and the bottom of your canvas, aim for 15-25cm. Closer than 15cm and the art looks like it's resting on the sofa. More than 25cm and the two elements stop talking to each other. This rule trumps the 145cm eye-level rule every time.
For canvas prints for living room settings specifically, err towards the upper end of that gap (around 20-25cm) above a sofa, because you'll mostly view the art while seated, and a slightly higher placement looks better from below.
Nails, screws, or adhesive strips: which to use and when
Forget the hardware-store overwhelm. For canvas art, you have three real options and the choice mostly comes down to weight and whether you can make holes in the wall.
Nails (or picture hooks)
The default. A single picture hook with a nail will hold most canvas art up to about 7kg, which covers anything up to roughly 80x120cm. They leave a hole the diameter of a cocktail stick, which fills with a smear of polyfilla in seconds.
Use a proper picture hook rather than a bare nail. The hook angles the nail downward into the wall, which is significantly stronger than a nail driven straight in. They cost about 50p each.
Screws and wall plugs
Overkill for most canvas, necessary for very large pieces (over 100cm in any dimension) or anything hung on plasterboard where you can't hit a stud. Use a 5mm wall plug and a 4mm screw. The hole is bigger but still trivial to fill.
Adhesive strips
Useful, but oversold. The honest version goes like this:
They work well on: smooth, painted plaster walls; lightweight canvas under 2kg; rooms without major temperature swings.
They fail on: textured walls (the kind with a slight bobble or orange-peel finish), bathrooms, freshly painted walls (paint needs 3 weeks to cure), wallpaper, and any canvas over about 3kg regardless of what the packet says.
When they fail, they tend to fail at 3am, with a thud. Use them for smaller canvas (under 60x80cm) on the right wall type, and replace them every couple of years.
How to hang canvas art without damaging your walls
The renter's playbook. The good news: canvas is light, so you have more options than someone hanging a heavy mirror.
Adhesive strips, used properly. Buy the largest size your canvas weight allows, then use one more pair than you think you need. Press for 30 seconds, wait an hour before hanging. To remove without taking paint off, pull the tab slowly and straight down parallel to the wall, not outward. Pulling outward is what rips the paint.
Adhesive hooks rated for picture hanging. These hold more weight than strips and let you take the canvas down easily for cleaning. Check the weight rating and halve it for safety.

A single small nail, honestly. Most landlords don't care about a few small holes if they're filled before you leave. A picture-hook nail leaves a hole smaller than 2mm. A 30g tub of polyfilla and a finger-smear at move-out is invisible. We're not telling you to break your tenancy agreement, but we are telling you that the gap between "what landlords technically prohibit" and "what they actually deduct from deposits" is wider than people think.
Picture rails, if you have them. Older properties often have a horizontal moulding running around the room about 30cm below the ceiling. Hook a picture rail hook over it, run wire or cord down to D-rings on the back of your canvas. Zero wall damage, period-appropriate, and you can rearrange endlessly.
For canvas art prints hung on tricky surfaces like brick, exposed plaster, or textured wallpaper, picture rails or a freestanding lean against the wall are often more honest solutions than fighting the surface.
Getting multiple canvases level without a spirit level
You don't need a spirit level. You need paper templates and patience.
The method:
- Lay your canvases on the floor first. Arrange them exactly as you want them on the wall. Photograph the layout from directly above so you have a reference.
- Measure the gaps between them. For two or more canvases hung together, the standard gap is 5-8cm. Less than 5cm starts to look cluttered. More than 10cm and the pieces stop reading as a group.
- Cut paper templates the exact size of each canvas (newspaper or wrapping paper works fine). Mark on each template where the hanging hardware sits on the back of the real canvas.
- Tape the templates to the wall in your chosen arrangement. Step back. Live with it for an hour or a day. Adjust until it looks right.
- Hammer through the templates at the marked hardware points. Tear the paper away. Hang the canvas.
For getting a single canvas level, here's a trick that works without a spirit level: use the top edge of a window or door frame as your horizontal reference. Stand back and check the canvas reads parallel to that fixed line. Your eye is remarkably good at spotting "not quite parallel" once you give it a reference.
For a true gallery wall (five or more pieces, mixed sizes), keep one consistent invisible line: usually either the top edges or the centre points of all pieces sitting on the same horizontal axis. Every other piece can vary, but that one anchor line keeps the whole thing from looking chaotic.
Common mistakes that make good canvas art look cheap
The hanging is often what separates "this looks great" from "something feels off but I can't tell what." The most common issues:
Hung too high. The number-one offender. If the bottom of your canvas is more than 30cm above your sofa back, it's too high. Art floating in a sea of empty wall above the furniture looks unanchored.
Too small for the wall. A small canvas in the middle of a large empty wall looks lost. Either go bigger or surround it with companion pieces. The two-thirds rule applies to walls too, not just furniture.
Wonky. A canvas that's even one degree off level reads as wrong, even to people who couldn't tell you why. If you're hanging on two hooks (which we recommend for anything over 60cm wide), measure twice.
Centred on the wrong thing. People centre canvases on the wall when they should be centring on the furniture, or vice versa. Rule of thumb: if there's furniture below, centre on the furniture. If the wall is empty floor-to-ceiling, centre on the wall.
Frame-canvas mismatch. Canvas can be hung framed or unframed. Unframed (the gallery-wrap look) suits modern, minimal rooms. A floating frame in oak or black suits more traditional spaces. Mixing a thin contemporary canvas with heavy traditional moulded frames elsewhere on the same wall creates visual friction.

Direct sunlight worry. Some people avoid sunny walls entirely. With museum-grade pigment inks and UV-protective construction, this is overcautious. Cheaper canvas prints fade in months. Properly made ones don't, and you shouldn't be designing around them as if they will.
Bedroom over-symmetry. For canvas print ideas for bedroom walls, people default to a single canvas centred over the bed. It works, but a pair of taller portrait canvases either side of the headboard often looks more considered, especially in rooms where the bed isn't centred on the wall.
Tools you actually need (spoiler: it's about four things)
Most online guides hand you a checklist of fifteen items including levels, laser measures, stud finders, and three sizes of drill bit. You don't need any of that for canvas.
The actual list:
- A tape measure. Any tape measure. The cheap one in your kitchen drawer is fine.
- A pencil. For marking the wall. Comes off with a damp cloth.
- A hammer. For picture hooks. If you only own one tool, own this.
- A small spirit level, or a level app on your phone. Modern phone apps are accurate to within a degree, which is plenty.
That's it. If you're hanging into masonry or going very large (over 100cm), add a basic drill and some 5mm wall plugs. Otherwise, the four items above will hang 95% of canvas art that exists.
A note on what arrives in the box: canvas from us comes hand-stretched over solid wood, properly tensioned, with hanging fixtures already attached. There's nothing to assemble, no separate frame to wrestle with, and the canvas won't warp or bubble at the corners. The single most common problem with canvas prints from elsewhere is poor stretching that goes slack within a year. If you've been burned before, that's the difference worth knowing about.
The bit at the end
If you take one thing from this: hang to the furniture, not to the room. Eye level is a starting point, not a religion. The two-thirds rule will save you more than any other piece of advice. And every mistake is fixable with a £2 tub of polyfilla and ten minutes.
Now go put a hole in the wall. You'll be fine.


Produits Fab présentés dans cet article
-

Toile citation tu es ton œuvre la plus importante
Translation missing: fr.products.product.sale_price À partir de €65,95€93,95 -

Toile femme en robe verte, élégance à rayures
Translation missing: fr.products.product.sale_price À partir de €65,95€93,95 -

Toile rayures audacieuses et chapeau rouge
Translation missing: fr.products.product.sale_price À partir de €65,95€93,95 -

Toile coin lecture chaleureux aux formes géométriques
Translation missing: fr.products.product.sale_price À partir de €65,95€93,95 -

Toile citation humour noir et blanc sur les gros mots
Translation missing: fr.products.product.sale_price À partir de €65,95€93,95 -

Toile vue du dessus d'un lit moderne et cosy
Translation missing: fr.products.product.sale_price À partir de €65,95€93,95 -

Toile assurance tranquille à rayures
Translation missing: fr.products.product.sale_price À partir de €65,95€93,95 -
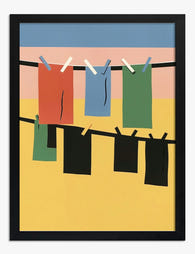
Affiche vêtements colorés sur corde à linge
Translation missing: fr.products.product.sale_price À partir de €19,95€33,25 -
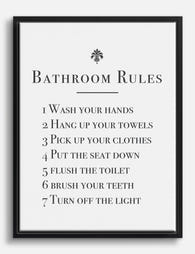
Toile rappels élégants pour la salle de bain
Translation missing: fr.products.product.sale_price À partir de €65,95€93,95 -

Toile randonneurs en montée noir et blanc
Translation missing: fr.products.product.sale_price À partir de €65,95€93,95 -
Toile coin lecture douillet
Translation missing: fr.products.product.sale_price À partir de €65,95€93,95 -

Toile à rayures verticales rouges et blanches, main élégante
Translation missing: fr.products.product.sale_price À partir de €65,95€93,95 -

Toile portrait à rayures bleu marine et beige
Translation missing: fr.products.product.sale_price À partir de €65,95€93,95 -

Toile au charme intemporel
Translation missing: fr.products.product.sale_price À partir de €65,95€93,95 -

Toile portrait rayures et reflets
Translation missing: fr.products.product.sale_price À partir de €65,95€93,95 -

Toile rituels du soir cocooning
Translation missing: fr.products.product.sale_price À partir de €65,95€93,95 -

Toile ambiance lounge chic
Translation missing: fr.products.product.sale_price À partir de €65,95€93,95 -

Toile all you need is love, rose et rouge
Translation missing: fr.products.product.sale_price À partir de €65,95€93,95 -

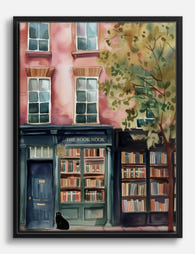
Toile librairie chaleureuse
Translation missing: fr.products.product.sale_price À partir de €65,95€93,95 -

Toile coin lecture chaleureux au salon
Translation missing: fr.products.product.sale_price À partir de €65,95€93,95


Plus de The Frame

Urban Jungle Interiors: Using Wall Art Instead ...
The urban jungle look is having a moment that refuses to end. But most of the people pinning those plant-drenched living rooms will never own 47 monsteras, and that's fine....

Room by Room: How to Hang William Morris Floral...
You've fallen for Morris. The question now is which floral goes where, at what size, in what frame. This guide skips the Arts and Crafts lecture and gets straight to...

Jungle Bedroom Ideas for Adults: Grown-Up Ways ...
Jungle bedrooms have a reputation problem. Search the term and you'll find nursery mood boards, cartoon monkeys, and bright kelly green walls that would keep anyone awake. The grown-up version...