How to Arrange Botanical Prints into a Gallery Wall That Looks Intentional
A foolproof system for hanging ferns, florals, and foliage prints so they feel curated, not chaotic.

Botanical prints are the easiest art category to love and the easiest to mess up on a wall. The subjects are varied (ferns, palms, wildflowers, mushrooms, cacti) which means cohesion has to come from how you arrange and frame them, not from the prints themselves. This guide walks you through a system that works whether you're hanging three prints above a sofa or nine across a stairwell.
Before you hang anything: planning your layout with paper templates
The single biggest mistake people make is committing to nail positions before they've seen the layout on the wall. The paper template method fixes this, and it takes about twenty minutes.
Cut a piece of paper (newsprint, brown parcel paper, or taped-together A4 sheets) to the exact dimensions of each frame. Write the orientation on the front. On the back, mark where the hanging hardware sits. This is the part most guides skip, and it's the part that matters: you're not marking the frame outline on the wall, you're marking where the nail goes.
To find that point, lay the frame face-down, pull the wire taut upward as if it were hanging, and measure from the top edge of the frame down to the peak of the wire. Transfer that measurement onto your paper template, measured down from the top edge. That's your nail mark.
Now stick the templates to the wall with low-tack painter's tape. Move them around. Live with them for a day or two. Step back, look from the doorway, look from the sofa. When you're happy, hammer the nail directly through the paper at your marked point, then tear the paper away.

The 2/3 rule for hanging height (and when to ignore it)
Galleries hang work so that the centre of the piece sits at roughly 145 to 152cm (57 to 60 inches) from the floor. That's average human eye level, and it's the baseline professional consensus.
For a gallery wall, you treat the entire arrangement as one piece. Find the visual centre of your whole grouping and aim to get that point at around 150cm.
The 2/3 rule applies when you're hanging above furniture: the artwork (or arrangement) should occupy roughly two-thirds of the width of the furniture below it. So a 200cm sofa wants an arrangement around 130 to 150cm wide.
Ignore the eye-level rule when furniture is in the way. Above a sofa, console, or bed, hang the bottom edge of the lowest frame 20 to 25cm (8 to 10 inches) above the furniture. Any closer and it looks cramped. Any further and the art floats off into nowhere, disconnected from everything below it.
Odd numbers work: why sets of 3 or 5 botanical prints feel balanced
Odd-numbered groupings feel more dynamic because the eye can't split them evenly down the middle. With an even number, your brain pairs them up and the arrangement reads as static. With three, five, or seven, there's always a centre that holds the composition together while the outer pieces create movement.
This is also why the rule of thirds works in photography and why florists arrange in odd stems. It's not mystical. It's just that asymmetry within a balanced frame reads as intentional, while perfect symmetry reads as either formal or accidental.
For botanicals specifically, three is the entry point. A botanical set of 3 above a sofa or bed hits the sweet spot for impact without overwhelming. Five gives you more rhythm and works beautifully in a horizontal line down a hallway. Seven to nine creates a salon-style wall, which suits larger blank spaces above a dining table or in a stairwell.
If you're starting out and feeling cautious, three is your number. If you have a wall over 200cm wide and you're committed to the gallery look, push to five or more. Anything less on a big wall just looks lonely.
Spacing, alignment, and the 5cm rule that saves every gallery wall
Spacing is where most gallery walls fall apart, because the advice you'll find online ranges from two to six inches with no explanation of when to use what.
Here's the framework we use:
- 5cm between frames for a modern, cohesive gallery wall. This is the default. It's tight enough that the pieces read as one composition, loose enough that each print breathes.
- 2 to 3cm for a denser, more traditional or formal look. Best when all frames are identical sizes in a strict grid.
- 7 to 10cm only when you're mixing significantly different sizes and need extra breathing room around the larger pieces.
Consistency matters more than the exact number. If you choose 5cm, every gap between every frame should be 5cm, both horizontally and vertically. Inconsistent spacing is what makes a wall look haphazard even when the prints themselves are beautiful.
For alignment, pick one anchor line and stick to it. Either align the tops of all frames, the bottoms, or the horizontal centre line through the middle of the arrangement. For grids, align both. The eye picks up on these invisible lines even when it can't articulate why an arrangement looks "right."

Choosing a consistent frame style to unify different plant subjects
This is the principle that separates an intentional botanical gallery wall from a chaotic one, and almost no one mentions it.
When your subjects vary (a fern next to a rose next to a cactus next to a monstera) the prints already carry a lot of visual variety. The frames need to be the unifier. Pick one frame style and one mat colour, and use them across every piece.
For botanicals, three frame choices work best:
- Natural oak or ash wood for a warm, organic feel that complements the plant subjects without competing.
- Black wood for a graphic, modern look that gives delicate botanical illustrations more weight on the wall.
- White wood for an airy, fresh feel, especially in bright rooms or against coloured walls.
Avoid metallics for botanicals. Gold and brass frames overpower delicate plant illustrations and shift the whole arrangement toward formal and ornate. Avoid mixing frame finishes too. One black, one oak, one white may feel "eclectic" in your head but reads as indecisive on the wall.
Mat colour is part of frame consistency. White or cream mats work for almost every botanical. Coloured mats are a commitment that limits your ability to swap prints later, so we'd avoid them unless you're certain.
If you're browsing options, our botanical art prints and broader plants art prints collections are framed in solid FSC-certified wood with UV-protective acrylic glaze, which means no glare and no fading even if your wall gets direct sunlight.
Mixing print sizes without it looking random
Same-sized frames in a grid are the safest path. They always look intentional. But mixing sizes is where gallery walls get interesting, and there are two reliable approaches.
The anchor method. Choose one larger piece (say 50x70cm) as your anchor and arrange smaller pieces (30x40cm) around it. The anchor sits slightly off-centre, never dead in the middle. This works brilliantly above sofas and beds.
The horizontal stack. Run a line of mixed-size frames along an invisible horizontal centre line. The tops and bottoms won't align, but the centres will, and that's what makes it read as cohesive.
The trap is mixing too many sizes. Stick to two sizes maximum for your first gallery wall. Three is possible but harder. Four or more sizes almost always looks accidental.
When mixing sizes, increase your spacing slightly. Bump up from 5cm to 6 or 7cm to give the larger pieces room. And keep the orientation logic consistent: don't have one piece in portrait and its neighbour in landscape unless you've planned it as a deliberate pair.

Tools you actually need (it's fewer than you think)
Skip the laser level and the fancy hanging kits. You need:
- A tape measure
- A pencil
- A spirit level (a small one, 20cm is plenty)
- Painter's tape
- Paper for templates
- A hammer and appropriate nails or picture hooks for your wall type
That's it.
Two practical tricks that genuinely help:
The toothpaste trick. If your frames have a fixed hook on the back rather than a wire, dab a tiny amount of toothpaste on the hook, press the frame against the wall in position, and lift it away. The toothpaste leaves a precise mark exactly where the nail needs to go. Wipe clean with a damp cloth afterward.
The painter's tape method. Run a long strip of painter's tape across the wall along your alignment line. Mark all your nail positions on the tape, hammer through it, then peel the tape away. This keeps everything perfectly level across a wide arrangement.
For walls that aren't perfectly plumb (older homes, wonky plaster), trust your level over the wall edge. A frame hung "level" against a sloping ceiling line will look more wrong than one that's true to gravity.
How ready-to-hang framing makes the whole process painless
The reason most people abandon a gallery wall halfway through isn't the planning. It's the moment they unbox prints and frames separately and realise they have to fit them together themselves, hope the print sits straight inside the frame, hope the frame doesn't warp, hope the hanging hardware is included.
The art prints we make at Fab arrive framed, fitted, and ready to hang in a single box. Fixtures are already attached. The print is properly mounted inside a solid wood frame, behind UV-protective acrylic glaze rather than glass, which means no glare, no fading, and no risk of breakage if you're rearranging.
This matters most for gallery walls because you're multiplying every potential problem by the number of prints. Three prints with three sets of separate frames means three chances for warping, three chances for the print to sit slightly crooked, three afternoons of fiddling. Three ready-to-hang framed prints means you can be on the wall within an hour.
If you're nervous about commitment, the paper template method gives you full control before any holes get drilled. And if a print doesn't work in the room once it's up, our 99-day returns policy means you've got time to live with it. Browse our full wall art sets if you'd rather start with a pre-curated grouping than build one from scratch.

A quick-start decision tree
If you're stuck on where to begin, match your wall to one of these:
- Above a sofa or bed: 3 to 5 prints, same size, in a horizontal line or 2x2 grid plus one. 5cm spacing. Bottom edge 20 to 25cm above the furniture.
- Narrow hallway: A vertical stack of 3, or a horizontal line of 5 same-sized prints at eye level.
- Large blank wall (over 2m wide): 7 to 9 prints in a salon arrangement with one anchor piece, or a 3x3 grid for maximum order.
- Stairwell: Follow the angle of the stairs with a stepped line of 5 to 7 prints, each one's centre aligned with the rise of the next stair.
Plan on paper, hang at the right height, keep your spacing consistent at 5cm, and let the frames do the unifying work. The botanicals themselves will take care of the rest.

Produits Fab présentés dans cet article
-

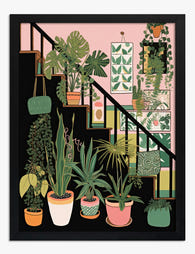
Toile escalier végétal
Translation missing: fr.products.product.sale_price À partir de €64,95€92,95 -

Affiche botanique, plantes sur étagère, fond jaune
Translation missing: fr.products.product.sale_price À partir de €16,95€23,95 -
Affiche escalier botanique
Translation missing: fr.products.product.sale_price À partir de €16,95€23,95 -

Toile escalier végétal
Translation missing: fr.products.product.sale_price À partir de €64,95€92,95 -

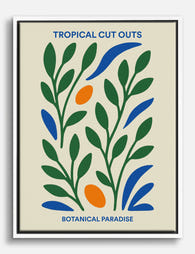
Affiche botanique tropicale en collage
Translation missing: fr.products.product.sale_price À partir de €16,95€23,95 -

Toile botanique rose aux courbes fluides
Translation missing: fr.products.product.sale_price À partir de €64,95€92,95 -

Affiche collection botanique minimaliste au trait
Translation missing: fr.products.product.sale_price À partir de €16,95€23,95 -

Affiche jardin en découpage végétal
Translation missing: fr.products.product.sale_price À partir de €16,95€23,95 -

Affiche botanique jardin d'herbes sauvages
Translation missing: fr.products.product.sale_price À partir de €16,95€23,95 -

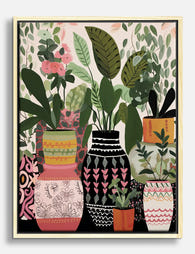
Affiche vases bohèmes aux motifs botaniques
Translation missing: fr.products.product.sale_price À partir de €16,95€23,95 -
Toile paradis botanique aux formes découpées
Translation missing: fr.products.product.sale_price À partir de €64,95€92,95 -

Toile harmonie botanique
Translation missing: fr.products.product.sale_price À partir de €64,95€92,95 -
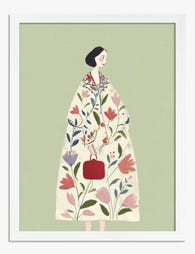
Affiche muse botanique
Translation missing: fr.products.product.sale_price À partir de €16,95€23,95 -

Toile botanique vibrante
Translation missing: fr.products.product.sale_price À partir de €64,95€92,95 -

Affiche plantes sur escalier
Translation missing: fr.products.product.sale_price À partir de €16,95€23,95 -

Affiche botanique moderne aux pétales graphiques
Translation missing: fr.products.product.sale_price À partir de €16,95€23,95 -

Affiche paysage botanique britannique
Translation missing: fr.products.product.sale_price À partir de €16,95€23,95 -
Toile vases bohèmes à motifs botaniques
Translation missing: fr.products.product.sale_price À partir de €64,95€92,95


Plus de The Frame

How to Build a French-Themed Gallery Wall That ...
A French-themed gallery wall sits on a knife edge. Done well, it reads like a well-travelled friend's flat in the 6th arrondissement. Done badly, it looks like the back wall...

How to Build a Meadow-Themed Gallery Wall That ...
Gallery walls intimidate people because they require dozens of small decisions to land right. Meadow art quietly removes most of those decisions for you, because the colour palette and mood...

How to Build a Traditional Art Gallery Wall Tha...
Most gallery wall guides assume you're working with abstract prints and quirky line drawings. Traditional art is a different beast: heavier subjects, richer palettes, more formal frames. Done wrong, you...