Kitchen Gallery Wall Ideas: How to Plan, Hang, and Actually Get It Right First Time
Exact measurements, copy-able layouts, and the paper template trick that means you only put holes in the wall once.

Most kitchen gallery walls fail before a single nail goes in. The prints arrive, you eyeball the layout, drill optimistically, and end up with something that feels chaotic instead of curated. This guide fixes that with specific measurements, copy-able layouts, and a paper template method that means you only commit to holes once.
Gallery wall vs single statement print: which suits your kitchen
Before you commit to a gallery wall, check whether your kitchen actually needs one. A single large print at 70x100cm above a sideboard or breakfast nook often does more visual work than five smaller prints fighting for attention.
Choose a gallery wall if you have a long blank stretch (over 1.5 metres wide), a dining nook with a clear focal wall, or a coffee station that needs personality. Choose a single statement print if your wall space is interrupted by cabinets, shelves, or windows, or if your kitchen is already busy with tiles, splashbacks, and open shelving.
Kitchens are visually noisy by nature. Cookware, ingredients, herbs, appliances. A gallery wall works best where the wall is genuinely the quietest part of the room, not when it's competing with a busy worktop directly below it.

Choosing a layout: grid, row, or salon hang for kitchens
Three layouts genuinely work in kitchens. Anything more elaborate tends to look fussy next to clean cabinet lines.
The grid
Two rows of two, or two rows of three, all the same size. The grid feels architectural and disciplined, which suits modern kitchens with handleless cabinets or shaker units in muted colours. It demands precision: any wonkiness reads immediately.
The horizontal row
Three or five prints of identical size in a single line. This is the most forgiving layout for kitchens because it sits naturally above worktops, dining benches, and console tables. It also flatters narrow walls between doorways.
The salon hang
Mixed sizes arranged with a strong central anchor and smaller prints orbiting around it. This looks brilliant in country kitchens, bistro-style spaces, and coffee corners. It's harder to plan, which is exactly why the paper template method later in this guide matters.
For most kitchens, we'd start with the row. It's the cleanest entry point and the hardest to get visibly wrong.
How many prints you actually need (hint: fewer than you think)
Odd numbers almost always look better than even ones. Three feels composed. Five feels generous. Two feels paired (which can look bedroom-y), and four reads as a grid even when you don't intend it to.
Here's a rough guide based on the wall space available:
- Up to 1 metre wide: one large print or a kitchen prints set of 3 at 30x40cm each
- 1 to 1.5 metres wide: a set of three at 40x50cm or 50x70cm
- 1.5 to 2.5 metres wide: five prints at 30x40cm in a row, or a salon hang anchored by a 70x100cm centrepiece
- Over 2.5 metres wide: seven prints, or a single statement piece scaled to dominate
The "set of 3" instinct is right for a reason. The brain reads three as a complete composition rather than counting individual pieces. Four pieces almost always need to become a 2x2 grid to feel resolved, which is a different design decision entirely.
Picking a cohesive theme: colour-led vs subject-led sets
A gallery wall lives or dies on whether the prints feel related. There are two reliable ways to make that happen.
Colour-led sets
Pick three to five prints that share a palette, even if the subjects are wildly different. A still life of lemons, an abstract in butter yellow, and a botanical with mustard accents will hang together because the eye reads colour first.
The 60-30-10 rule helps here: across the whole gallery, 60% of the visible colour should be your dominant tone (often a neutral or one strong shade), 30% a secondary colour, and 10% an accent that reappears in each piece. It's how interior designers build cohesion without making everything matchy.
Subject-led sets
Pick prints that share a theme: food illustrations, botanical studies, vintage menus, market scenes. Subject-led sets are more forgiving on colour because the connection is conceptual.
Our rule of thumb for kitchen wall art: pick one and commit. Mixing colour cohesion and subject cohesion (a green abstract, a green lemon print, and a green typography piece) often ends up feeling thematic in a try-hard way. Sticking to one organising principle reads as more confident.
For kitchens specifically, food, botanicals, and abstract pieces in warm neutrals tend to outperform typography and figurative work, which can feel dated faster.

Exact spacing and positioning measurements for kitchen walls
This is where most guides go vague. Here are the numbers.
Spacing between frames
5 to 7cm between frames is the universal standard for gallery walls. Closer (3 to 4cm) makes the group read as a single composition, which works for tight grids. Wider (8 to 10cm) makes each frame feel like its own moment, which works for salon hangs in larger rooms.
Stay consistent. If you start with 6cm gaps, every gap should be 6cm.
Height from the floor
The centre of your gallery wall (not the centre of each frame, the centre of the whole arrangement) should sit between 145 and 152cm from the floor. This is the museum standard and matches average eye level.
In a kitchen, you'll often need to override this for the furniture below.
Distance from worktops, tables, and benches
Aim for 18 to 25cm between the bottom of the lowest frame and the surface below it. Less than 18cm feels squashed. More than 25cm and the art floats away from the furniture, breaking the visual connection.
Above a dining table specifically, 20cm is the sweet spot.
Distance from heat and moisture
Don't hang prints within 60cm of a hob or 45cm of a sink. Steam and splash damage are real risks, and even with UV-protective glazing and water-based inks, you don't want repeated exposure. Canvas handles humidity slightly better than paper prints in framed glass, but neither belongs directly above a kettle that lives on full boil.
The best kitchen gallery wall locations: a dining nook, the wall above a coffee station, a blank stretch opposite the cooking zone, or a hallway-into-kitchen transition wall.
The two-thirds rule
Whatever sits below your gallery wall (a sideboard, a dining bench, a console), the gallery should span roughly two-thirds of its width. A 180cm dining bench wants a gallery around 120cm wide. Going narrower makes the art look undersized. Going wider makes the furniture look stranded.
The frame finish that ties everything together
Mixed prints, single frame finish. This is the rule that turns a chaotic collection into a curated wall.
Pick one frame colour and apply it to every print in the gallery. Black for graphic, contemporary kitchens. Natural oak for warm, Scandi, or country kitchens. White for very minimal or coastal kitchens. Walnut for traditional kitchens with darker cabinetry.
Solid wood frames matter more than people realise. MDF and veneer frames warp in humid environments, and kitchens are humid environments. FSC-certified solid wood holds its shape and looks better up close, which is exactly where people stand in kitchens.
UV-protective acrylic glazing (rather than glass) is also worth specifying for kitchens. It won't shatter if a frame falls near a tiled floor, and it prevents fading from the sunlight that streams through most kitchen windows.
If your kitchen runs particularly steamy and you can't avoid it, canvas prints are the more resilient choice. The poly-cotton stretch handles moisture better than paper behind glazing, and you can hang them unframed for an even lighter, more casual look.
Step-by-step hanging guide with no special tools required
You need: kraft paper or newspaper, scissors, masking tape, a pencil, a tape measure, a spirit level (or the level app on your phone), and a hammer with picture hooks. That's it.
Step 1: Lay everything out on the floor first
Clear a section of floor the size of your wall. Arrange the prints until the composition feels right. Photograph it from directly above. This is your reference.
Step 2: Make paper templates
Trace each frame onto kraft paper or newspaper and cut out the shape. Mark where the hanging hook sits on the back of each frame, then transfer that mark to the corresponding template. This is the single most important step in the whole process.
Step 3: Tape the templates to the wall
Using masking tape (which won't damage paint), arrange your paper templates on the wall in the layout you photographed. Use your tape measure to enforce consistent gaps: 5cm, 6cm, or whatever you've chosen.
Step 4: Check the height
The centre of the whole arrangement should be 145 to 152cm from the floor, or 18 to 25cm above any furniture below. Adjust the whole group up or down as needed.
Step 5: Level and step back
Use a spirit level on the top edges. Step back at least two metres and check from every angle you'll see the wall from. Sit at the dining table if there is one. Walk in from the doorway. Adjust until it looks right from the angles that matter.
Step 6: Mark and hammer
Hammer a picture hook (or nail, if your prints are light) directly through the marked spot on each paper template. Tear the paper away. Hang each frame on its hook.
Framed prints that arrive ready to hang with fixtures already attached make this dramatically easier. You're not faffing with separate hanging kits or wondering if the d-ring is in the right place.

Three kitchen gallery wall arrangements you can copy exactly
Arrangement 1: The classic row of three
Wall width needed: 1.4 metres minimum
Prints: Three at 40x50cm, portrait orientation
Spacing: 6cm between each frame
Total width: 132cm
Height: Centre line 150cm from floor, or 22cm above the furniture below
This works above a dining bench, a console table, or a long sideboard. Choose three pieces from the same series for instant cohesion. A botanical trio, three food illustrations, or three abstracts in a shared palette all work. Browse sets of 3 wall art to see ready-made trios.
Arrangement 2: The 2x3 grid
Wall width needed: 1.5 metres minimum
Prints: Six at 30x40cm, portrait orientation
Spacing: 5cm between frames horizontally and vertically
Total dimensions: 100cm wide x 90cm tall
Height: Centre line 148cm from floor
The grid is your move for modern kitchens with clean cabinet lines. Pick six prints that share a tight palette: think six botanical studies in shades of sage and cream, or six abstract compositions in warm neutrals. Same frame finish on all six, no exceptions.
Arrangement 3: The salon hang with a centrepiece
Wall width needed: 2 metres minimum
Prints: One large at 70x100cm (centre), four smaller at 30x40cm (orbiting)
Spacing: 7cm between the central piece and each smaller frame
Layout: Large print central, two smaller prints stacked to its left (top and bottom), two stacked to its right
Height: Centre of the large print at 150cm from floor
The salon hang works best in country kitchens, bistro-style spaces, and coffee corners. Anchor it with a strong centrepiece (a vintage market scene, a confident still life, or a bold abstract) and let the smaller pieces support it. This is the layout where colour cohesion matters most. Pull from the food and drink prints collection for a kitchen-appropriate centrepiece.
A note on seasonal refreshes
Once your gallery is up, you don't have to leave it forever. Swap one or two prints (never the whole wall) every six months or so. Keep the same frame, same size, same hanging hook. Just slide a new print in.
This is how you keep a kitchen feeling current without re-drilling holes or rethinking the whole composition. The infrastructure stays. The art evolves.

Final thought
The single thing that separates a gallery wall that works from one that doesn't is committing to the planning before the hammer comes out. Lay it out on the floor, cut the paper templates, tape them to the wall, live with it for a day if you can. The thirty minutes you spend on templates saves you the regret of holes in the wrong place. Get the measurements right and the prints almost hang themselves.

Produits Fab présentés dans cet article
-

Toile cuisine au trait ludique
Prix promotionnel À partir de €54,95€91,95 -

Affiche règles de cuisine noir et blanc
Prix promotionnel À partir de €14,95€24,95 -

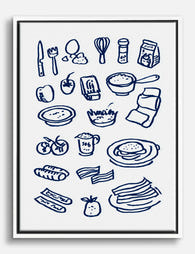
Toile indispensables de cuisine dessinés à la main
Prix promotionnel À partir de €54,95€91,95 -

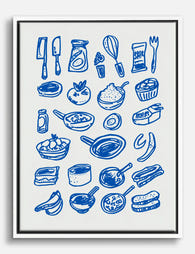
Toile indispensables de cuisine bleus
Prix promotionnel À partir de €54,95€91,95 -
Toile ustensiles et ingrédients de cuisine bleus
Prix promotionnel À partir de €54,95€91,95 -

Toile typographique règles de cuisine
Prix promotionnel À partir de €54,95€91,95 -

Toile cuisine festive et chaleureuse
Prix promotionnel À partir de €54,95€91,95 -

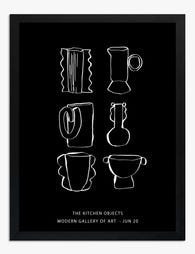
Toile objets de cuisine au trait blanc sur fond noir
Prix promotionnel À partir de €54,95€91,95 -
Toile ustensiles et ingrédients de cuisine bleus
Prix promotionnel À partir de €54,95€91,95 -

Toile cuisine moderne aux lignes graphiques
Prix promotionnel À partir de €54,95€91,95 -

Affiche ustensiles et ingrédients de cuisine ludiques
Prix promotionnel À partir de €14,95€24,95 -

Toile cuisine conviviale et colorée
Prix promotionnel À partir de €54,95€91,95 -

Toile oasis moderne pour la cuisine
Prix promotionnel À partir de €54,95€91,95 -

Toile cuisine colorée avec vue sur la ville
Prix promotionnel À partir de €54,95€91,95 -

Toile typographique danse en cuisine
Prix promotionnel À partir de €54,95€91,95 -

Toile ingrédients de cuisine illustrés
Prix promotionnel À partir de €54,95€91,95 -

Toile cuisine chaleureuse et gourmande
Prix promotionnel À partir de €54,95€91,95 -

Affiche cuisine conviviale et colorée
Prix promotionnel À partir de €14,95€24,95 -
Affiche ustensiles de cuisine au trait noir et blanc
Prix promotionnel À partir de €14,95€24,95 -
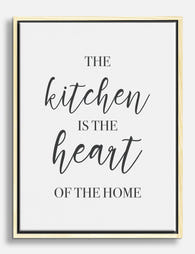
Toile citation cœur de la maison
Prix promotionnel À partir de €54,95€91,95


Plus de The Frame

The Best Tulip Wall Art for Every Interior Styl...
Tulips are having a proper moment in interiors, and the range of prints available can make choosing feel harder than it should be. Once you understand the four main styles...

What Do Tulips Symbolise in Art? From Dutch Sti...
Tulips carry more baggage than any other flower in art history. They've been religious symbols, financial weapons, moral warnings, and quiet objects of beauty. Understanding that lineage changes how you...

Living Room William Morris Forest Designs: Hist...
Morris and the English woodland: where the obsession began Before William Morris was a designer, a poet, a socialist, or the reluctant father of modern interior style, he was a...