How to Build a Minimalist Plant Gallery Wall That Actually Looks Minimal
The strategic approach to botanical wall art that feels curated and calm, never cluttered or chaotic.

Most gallery walls fail in the same way: too many prints, mismatched frames, and spacing that looks accidental. A minimalist plant gallery wall flips the formula. You're not filling a wall, you're composing one, and the negative space matters as much as the prints themselves.
The golden rule of minimalist gallery walls: fewer prints, more breathing room
Here's the counterintuitive bit. Minimalism isn't about restraint for its own sake, it's about giving each print enough room to be looked at. Three botanical prints with generous breathing space will always look more considered than seven prints jostling for attention.
Our rule of thumb is a maximum of three prints per wall for true minimalism. Two often works even better. The empty wall around the arrangement is doing real visual work, framing the prints the way a mat board frames a single image.
If you're tempted to add a fourth or fifth print to "fill the space," the problem isn't the print count. The wall is too small, the prints are too small, or you're trying to hide a feature you should be embracing.

Three proven layouts (horizontal line, stacked pair, asymmetric trio)
Skip the Pinterest grid. For minimalist botanical wall art, three layouts do almost all the heavy lifting.
The horizontal line
Three identically-sized prints in a row, hung at the same height, evenly spaced. This is the most architectural option and works beautifully above sofas, sideboards, and beds. The repetition creates rhythm, and the consistency makes even busy botanical illustrations feel calm.
Best with portrait-orientation prints between 30x40cm and 50x70cm, depending on your wall width.
The stacked pair
Two prints, one above the other, centred on a vertical axis. Brilliant for narrow walls, between windows, or beside doorways where a horizontal layout simply won't fit. A stacked pair feels intentional and editorial, almost like a magazine spread.
Use the same size and orientation for both prints. Mixing sizes here breaks the column and undoes the effect.
The asymmetric trio
One larger print on one side, two smaller prints stacked on the other. The visual weight balances even though the arrangement isn't symmetrical. This layout reads as the most "designed" of the three and works particularly well in lounges and home offices where you want a focal point with personality.
A common version: one 50x70cm print on the left, two 30x40cm prints stacked on the right, with the outer edges aligning vertically.
How to choose prints that work together without matching too perfectly
The botanical category has a specific failure mode we'll call the chaos arrangement: every print is technically of plants, but the styles, palettes, and treatments are wildly different. One watercolour fern next to a vintage scientific illustration next to a moody monstera photograph. Each print is fine on its own. Together they look like a mood board that lost a fight.
Three principles solve this.
Match the illustration style. Pick a lane and stay in it. Line drawings with line drawings. Soft watercolours with soft watercolours. Pressed-botanical specimens with pressed-botanical specimens. The subject matter (fern, eucalyptus, fig leaf) can vary freely as long as the visual treatment is consistent.
Stick to a tight palette. Most successful minimalist plant walls use a neutral base (cream, off-white, soft beige) with one accent colour pulled across all the prints. Sage green is the most forgiving, but soft terracotta, dusty blue, and warm charcoal all work. If one print introduces a colour the others don't share, it will pull focus.
Vary the composition, not the mood. A close-up leaf next to a full plant next to a botanical study creates visual interest without breaking cohesion, as long as the previous two rules hold. The eye wants difference within sameness.
If you're building from scratch, browsing pre-curated wall art sets takes most of this guesswork away. The prints have already been selected to live together.

Spacing and alignment: the measurements that actually matter
Everyone tells you to leave "a few inches" between frames. We'll be specific: 5 to 8cm (roughly 2 to 3 inches) between frame edges is the sweet spot for a minimalist arrangement.
Here's why that range works. Closer than 5cm and the prints start to read as one cluttered object, the eye can't separate them. Wider than 8cm and they stop relating to each other, becoming three independent decisions rather than one composition. The 5 to 8cm gap is close enough to feel grouped, far enough to feel calm.
For larger prints (60x80cm and up), nudge towards 8 to 10cm. The frames are visually heavier and need more breathing room.
The eye-level rule
Hang the centre of your arrangement at 145 to 152cm (57 to 60 inches) from the floor. This is gallery standard, and it works because it sits at average adult eye level. Above furniture, leave 10 to 15cm between the top of the sofa or sideboard and the bottom of the lowest frame. Any closer and the art looks like it's resting on the furniture. Any further and it floats untethered.
The paper template method
Before you make a single hole, cut paper templates the exact size of your frames. Use masking tape to position them on the wall. Live with the layout for a day. Adjust until the spacing looks right in the actual light of the actual room, not on a measuring tape.
This step takes twenty minutes and saves you from filling holes later. It's the single best thing you can do to avoid a hanging disaster.
Why consistent framing is non-negotiable for a minimal look
This is where most plant gallery walls quietly fall apart. People obsess over print selection then hang them in whatever frames they have lying around. Three different frame colours, two different widths, one with a mat and two without. The arrangement instantly reads as messy regardless of how good the prints are.
For a minimal aesthetic, the frames should disappear. They're scaffolding for the art, not the feature. That means:
- One frame colour across the entire wall. Black, white, natural oak, or warm walnut. Pick one.
- One frame width. Thin profiles (around 2cm) feel more contemporary and minimal. Chunkier profiles work but commit to one width.
- Either all matted or all unmatted. Mats add formality and breathing room within the frame itself, but mixing matted and unmatted prints in the same arrangement breaks the rhythm.
A note on materials: solid wood frames hold their shape and look properly finished. Cheaper frames made of MDF or veneered composite tend to warp slightly over time, especially if your home varies in humidity, and the joints become visible. Our framed prints use solid FSC-certified wood with UV-protective acrylic glaze rather than glass, which means no glare and no fading even on sunlit walls. Worth knowing if your gallery wall is going somewhere bright.
For coordinated framing across multiple prints, browsing a single collection like minimalist art prints keeps frame options consistent.
Hanging tips so everything stays level (no DIY disasters)
Once your paper templates are positioned and the spacing looks right, mark the hanging points directly through the paper onto the wall. Pencil dot, then remove the paper.
For framed prints with hanging fixtures already attached (which is how ours arrive), measure from the top of the frame to the hanging wire or D-ring on the back. Transfer that measurement down from the top edge of your paper template. That's where the nail or hook goes.
A few practical points that prevent disasters:
- Use a proper spirit level, not a phone app. Phone apps are surprisingly inaccurate.
- For prints over 50x70cm, use two fixings per frame rather than one. Single-point hanging lets the frame tilt over time.
- In plasterboard walls, use proper plasterboard fixings rated for the weight. Standard nails will pull out within months.
- Canvas prints are significantly lighter than framed prints of the same size, which matters if you're hanging on tricky surfaces or want flexibility to rearrange.
If you're hanging three prints in a horizontal line, measure from the ceiling rather than the floor for your top reference points. Floors are rarely level. Ceilings are rarely level either, but in most rooms they're closer.

Gallery wall ideas for hallways, bedrooms, and above sofas
Different rooms ask different things of a gallery wall. Here's how the three layouts map to specific spaces.
Hallways
Hallways are typically narrow and long, which makes them perfect for a horizontal line of three prints. People walk past rather than stopping to look, so the rhythm of repetition is more important than detail. Stick to smaller prints (30x40cm) and hang slightly higher than usual, around 155cm to centre, because viewers will be standing rather than seated.
Avoid hanging directly opposite a strong light source. Even with anti-glare acrylic, awkward reflections can flatten the image. For more options sized for narrow spaces, hallway wall art is a useful starting point.
Bedrooms
Above the bed is the obvious spot, and a stacked pair or horizontal trio both work. Keep the arrangement narrower than the bed itself, ideally around two-thirds of the bed's width. The composition should feel anchored to the bed, not competing with it.
Soft, calming botanical subjects (eucalyptus, ferns, single stems) suit bedrooms better than dramatic tropical foliage. The point is wind-down, not stimulation.
Above sofas
The classic location and the easiest to get wrong. The arrangement should span roughly two-thirds the width of the sofa. Smaller and it looks lost. Wider and it feels like the art doesn't know where the sofa ends.
The asymmetric trio works particularly well here because sofas are themselves asymmetric (you tend to sit on one side). The stacked pair on one end with a larger anchor print on the other balances the seating.
Leave 15 to 20cm between the top of the sofa back and the bottom of the lowest frame. Closer than that and guests will worry about knocking the frame when they sit down.
Common mistakes that ruin minimalist gallery walls
A quick troubleshooting list if your arrangement looks cluttered despite your best efforts:
- Spacing too tight. Frames closer than 5cm read as one chaotic blob. Push them apart.
- Mixed frame styles. Even one rogue frame in a different colour or width breaks the entire scheme.
- Prints too busy. Three highly detailed botanical illustrations need wider spacing than three simple line drawings. Match complexity to layout.
- Wall too small. A trio on a 1.5m wall will always feel cramped. Drop to two prints, or commit to a single statement piece.
- Wrong location. Avoid busy wallpaper backgrounds, walls directly above radiators (heat warps everything over time), and walls in extreme direct sunlight if your prints aren't UV-protected.
- Hung too high. When in doubt, lower it. Most people hang art too high by a good 10 to 15cm.

A final thought on restraint
The hardest part of building a minimalist plant gallery wall isn't the measuring or the hanging. It's resisting the urge to add one more print. Walk away from the finished arrangement, come back the next morning, and ask yourself if it needs anything. Almost always, the answer is no. The wall around the prints is part of the composition, and that empty space is what makes the whole thing feel intentional rather than improvised.

Productos Fab destacados en este blog
-

Lámina botánica con macetas sobre estante, fondo amarillo
Translation missing: es.products.product.sale_price Desde £11.95£19.95 -

Lienzo dibujo botánico minimalista de planta en maceta
Translation missing: es.products.product.sale_price Desde £44.95£74.95 -

Lienzo escalera botánica con plantas de interior
Translation missing: es.products.product.sale_price Desde £44.95£74.95 -

Lámina colección de arte lineal botánico
Translation missing: es.products.product.sale_price Desde £11.95£19.95 -

Lienzo botánico minimalista con boceto de planta en maceta
Translation missing: es.products.product.sale_price Desde £44.95£74.95 -

Lienzo oasis de plantas en la escalera
Translation missing: es.products.product.sale_price Desde £44.95£74.95 -

Lámina botánica moderna en tonos neutros
Translation missing: es.products.product.sale_price Desde £13.99£19.99 -

Lámina botánica minimalista suave en marrón cálido
Translation missing: es.products.product.sale_price Desde £13.99£19.99 -
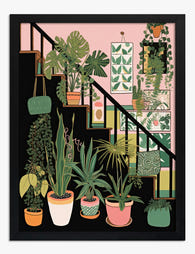
Lámina escalera botánica ecléctica
Translation missing: es.products.product.sale_price Desde £11.95£19.95 -

Lienzo botánico de planta en maceta de líneas modernas
Translation missing: es.products.product.sale_price Desde £44.95£74.95 -

Lámina botánica de jarrones boho
Translation missing: es.products.product.sale_price Desde £11.95£19.95 -

Lámina armonía botánica boho
Translation missing: es.products.product.sale_price Desde £11.95£19.95 -

Lámina de flor botánica moderna
Translation missing: es.products.product.sale_price Desde £11.95£19.95 -

Lámina botánica de jardín de hierbas silvestres
Translation missing: es.products.product.sale_price Desde £11.95£19.95 -

Lámina de boceto botánico en blanco y negro
Translation missing: es.products.product.sale_price Desde £11.95£19.95 -

Lámina botánica elegante en verde oscuro
Translation missing: es.products.product.sale_price Desde £11.95£19.95 -

Lámina dibujo minimalista de planta con hojas
Translation missing: es.products.product.sale_price Desde £11.95£19.95 -

Lámina jardín en collage botánico
Translation missing: es.products.product.sale_price Desde £11.95£19.95 -

Lámina flor blanca minimalista
Translation missing: es.products.product.sale_price Desde £13.99£19.99 -

Lámina botánica moderna de dibujo lineal
Translation missing: es.products.product.sale_price Desde £11.95£19.95


Más de The Frame

How to Style Vintage City Prints Without Lookin...
Vintage city prints are the easiest art category to get wrong. They're widely available, instantly recognisable, and almost designed to read as filler when hung without thought. This guide is...

Why Impressionist Art Looks Incredible in Moder...
There's a quiet contradiction in how we decorate now. We chase clean lines and quiet palettes, then hang 150-year-old paintings of poppy fields above the sofa. It works, beautifully, and...

How to Build a Floral Gallery Wall Around Bouqu...
You bought a bouquet print. You hung it up. You love it. And now the wall around it looks emptier than before. This guide is for that exact moment, with...