How to Decorate a Hallway With Art (And Finally Make It Feel Finished)
A practical, art-focused guide to sizing, choosing, and hanging prints in the most overlooked space in your home.

Hallways are the rooms you walk through without thinking, until guests arrive and you suddenly notice the bare walls. This guide is for anyone staring at an empty corridor wondering what size, what subject, and where on earth to put it. We'll skip the rugs and console tables and focus entirely on the art.
Why hallways deserve better than afterthought art
Your hallway is the first thing anyone sees when they walk in, and the last thing they see when they leave. It also connects every other room in your home, which means it sets the visual tone for the lot. Treating it like a leftover space is how you end up with a beautiful living room and a corridor that feels like a Travelodge.
The trick is to stop thinking of hallway art as decoration and start thinking of it as a transition. You're not creating a place to linger, you're creating a sequence of moments people experience while moving. That changes everything about how you choose and hang it.

Narrow hallway vs wide entrance hall: different approaches
Hallway dimensions are the single biggest constraint on what works, and they should drive every decision before you even think about subject or style. We'd split hallways into three categories: narrow corridors (under 110cm wide), standard hallways (110 to 150cm wide), and wide entrance halls (over 150cm wide).
In a narrow corridor, you don't have room to step back, so viewers will see your art at an angle as they walk past. Vertical orientation works better, prints should be smaller and more frequent, and busy compositions get lost. In a wide entrance hall, you have proper viewing distance, which means you can go large, horizontal, and detailed without overwhelming anyone.
The mistake most people make is treating a narrow hallway like a small living room. It isn't. A 70x100cm framed print that looks magnificent above a sofa will feel oppressive when you're squeezing past it with the shopping.
Choosing the right size print for your hallway dimensions
Forget vague advice about "considering your space." Here are the actual numbers we work with.
Sizing rules by hallway width
For corridors under 110cm wide, keep frames at 30x40cm or 40x50cm maximum. Anything larger crowds the space and you can't get far enough away to see it properly. Vertical orientation gives you more presence without eating into walking space visually.
For hallways between 110 and 150cm, you've got room for 50x70cm prints comfortably, and 60x80cm works if your wall is long enough. This is the sweet spot for most British homes.
For entrance halls over 150cm wide, you can go up to 70x100cm framed, or push into canvas territory at 100x150cm if you want a proper statement. With wide spaces, undersized art looks lost.
Sizing rules by wall length
A single piece should occupy roughly 60 to 75% of the available wall width (measuring between architectural interruptions like doors or radiators). If your unbroken wall is 120cm, you want art that's 70 to 90cm wide, including the frame.
For gallery walls, the entire arrangement should follow the same 60 to 75% rule, with at least 5cm of breathing room between frames. Cluttered groupings look chaotic in narrow spaces, especially when seen at an angle.
Hanging height for walking, not sitting
Standard gallery hanging puts the centre of the artwork at 145cm from the floor (eye level for the average adult standing). In hallways, where everyone is walking, we'd nudge that up slightly to 150cm. Walking eye level sits a touch higher than seated viewing, and you want the art to meet you, not pull your gaze down.
If you're hanging above a console table or radiator cover, leave 15 to 20cm between the top of the furniture and the bottom of the frame. Less than that looks cramped, more than that looks disconnected.
The best subjects and colour palettes for transitional spaces
Hallway art is experienced in seconds, not minutes. That changes what works.
Highly detailed compositions, dense narrative scenes, and pieces that reward long looking are wasted in a hallway. You'll never stand still long enough to appreciate them. Save those for the bedroom or study.
What works in transitional spaces: graphic compositions with clear shapes, confident colour, strong contrast, and immediacy. Think bold botanicals, abstract shapes, architectural photography, single-subject portraits, or moody landscapes with one strong focal point. Anything you can read at a glance.
Colour palettes that bridge rooms
Your hallway connects every room in your home, which means it has to play nicely with all of them without trying to match any of them. The cleanest approach is a restrained palette that contrasts with your wall colour but pulls in one accent shade from an adjacent room.
Black and white prints are the safest bet here, and we mean that as a compliment. They work with literally any colour scheme you've got going on elsewhere, they handle low light beautifully, and they create a calm visual rhythm without competing.
If you want colour, botanical prints in muted greens, terracotta, or ochre tend to bridge spaces well because they reference nature, which is already your most universal palette. What we'd avoid: highly saturated, trend-driven colours that fight whatever's happening in your living room.

Single statement piece vs gallery wall: which is right for you
This decision shouldn't come down to personal preference. It should come down to architecture.
Choose a single statement piece if:
Your hallway has one strong, unbroken wall (over 150cm long with no doors, switches, or radiators interrupting it). The wall is at the end of the corridor, where it acts as a visual destination. Your hallway is short (under 3 metres long). The architecture itself is busy (panelling, archways, period features) and competing arrangements would muddle it.
A single 60x80cm or 70x100cm framed print on a clean wall does more work than ten small prints scrambling for attention.
Choose a gallery wall if:
Your hallway is long (over 4 metres) and needs visual rhythm to avoid feeling like a tunnel. You have multiple shorter wall sections broken by doors, and a single large piece won't fit any of them properly. You want the hallway to feel collected and personal rather than gallery-formal.
For long hallways, we'd actively recommend a wall art set or curated grouping rather than a single piece, because the eye needs something to do as you walk.
The zones approach for long hallways
If your hallway is over 5 metres, treat it as two or three distinct zones rather than one continuous wall. Maybe a single statement piece near the entrance, a small grouping in the middle, and another single piece at the far end. The zones should feel related (consistent frame style, overlapping palette) without repeating.
This stops a long hallway from either feeling empty or descending into wallpaper-density clutter.
Practical hanging tips for hallway walls (including picture rails)
Hallways throw practical curveballs that other rooms don't.
Working around doors and architectural breaks
Measure your unbroken wall sections before you buy anything. The most common mistake is buying a print sized for the whole hallway, then realising the only place to actually hang it is a 90cm gap between two doors.
Treat each section between doors as its own composition. A small print can hold its own in a tight section if it's properly centred. Two prints stacked vertically work brilliantly in narrow gaps where horizontal space is short.
Picture rails (if you've got them)
Period homes often have picture rails running along the upper wall. Use them. You hang prints on near-invisible cord or chain from brass picture hooks that clip over the rail, no nails required. This is also the answer for renters who can't make holes.
The look is slightly more traditional, and it does drop your hanging height (the cord adds visible distance). Account for this by choosing slightly larger prints than you'd otherwise pick, since the negative space above will feel generous.
Renter-friendly options
Adhesive strips (the proper heavy-duty ones) hold framed prints up to about 3kg reliably, which covers most prints up to 50x70cm. For anything heavier, picture rails or freestanding leaning arrangements on a console table are your friend.
Textured walls (woodchip, plaster) don't take adhesive well. Picture rails or leaning are the realistic options here.
Test before you commit
Cut paper templates to the exact size of any print you're considering and tape them to the wall for a few days. Walk past them. Live with them. It's the closest you'll get to seeing it in your space, and it'll catch sizing mistakes before you've spent any money. Returnable prints (we offer 99 days) make this easier if you do want to commit and adjust.

Lighting your hallway art when natural light is limited
Most hallways don't have windows. This is the single most ignored factor in hallway art, and it's why so many corridors feel grim no matter what's on the walls.
Why standard ceiling lights fail your art
Overhead pendants and spotlights cast light downward, which means most of your art sits in shadow with a hot patch on top. Your prints will look flat, dull, and a stop darker than they actually are. We've seen people return art they thought was wrong, when really their lighting was the problem.
What actually works
Picture lights mounted above each frame are the gold standard. Battery-operated versions exist now that don't require wiring, and they make framed prints look like they belong in a gallery. Choose warm white (2700K to 3000K) for a flattering, natural tone. Cool white makes art look clinical.
Wall sconces between frames work for gallery walls, washing light across the whole arrangement. Aim for adjustable arms so you can angle light onto the art rather than into your eyes.
For low-effort improvement, swap your existing hallway bulbs to 2700K warm white at 800 lumens or higher. It won't replace dedicated picture lighting, but it'll stop your prints looking grey.
A note on glare and finish
This is where the print itself matters. Glossy paper and glass framing reflect every light source and turn art into a mirror, which is brutal in a tight hallway. Matte papers (like the museum-grade giclée we use) absorb light rather than bounce it, and acrylic glazing avoids the harsh reflections of glass. In a dim hallway with mixed light sources, this is the difference between art you can see and art you can't.
5 hallway art arrangements you can copy right now
1. The narrow corridor trio
Three vertical 30x40cm framed prints, evenly spaced along one wall, centred at 150cm. Same frame, related subjects (three botanicals, three architectural studies, three abstracts). Quiet, rhythmic, and proportionally correct for tight widths.
2. The end-of-hall destination piece
One 70x100cm framed print on the wall at the end of your hallway, centred at 150cm. Pick something with depth (a landscape, an atmospheric photograph) that draws the eye through the space. Turns the corridor itself into a frame.
3. The above-console grounding
A single 60x80cm landscape-oriented print hung above a console table, with the bottom of the frame 18cm above the table surface. Add one tall object on the table (a vase or lamp) just off-centre to break the symmetry. Works in any entrance hall over 130cm wide.
4. The salon-style gallery for long walls
A relaxed gallery wall of 7 to 9 prints in mixed sizes (mix 30x40cm, 40x50cm, and one anchor piece at 50x70cm), unified by consistent frames. Hang the largest piece slightly off-centre, with smaller pieces orbiting around it. Best for hallways over 4 metres with at least one long unbroken wall.
5. The two-zone approach
For hallways with doors interrupting the walls: one statement piece near the entrance (60x80cm), and one matching-frame trio further down. Connect them with shared palette or subject matter without repeating exactly. Makes long hallways feel composed rather than empty.

Final thoughts
The hallways that feel finished are the ones treated as their own space, not as overflow walls for whatever didn't fit elsewhere. Measure your widths, respect the viewing-while-walking thing, light it properly, and pick fewer pieces than you think you need at slightly larger sizes than you think you can get away with. That's the entire formula. Everything else is just choosing what you actually want to look at every day on your way out the door.

Fab products featured in this blog
-
Pastel Archway Entrance Art Print
Translation missing: en.products.product.sale_price From £11.95£19.95 -
Eclectic Botanical Stairway Art Print
Translation missing: en.products.product.sale_price From £11.95£19.95 -

Lush Staircase Sanctuary Art Print
Translation missing: en.products.product.sale_price From £11.95£19.95 -

Sunflower Serenity Art Print
Translation missing: en.products.product.sale_price From £11.95£19.95 -

Sunlit Forest Pathway Art Print
Translation missing: en.products.product.sale_price From £13.99£19.99 -

Pastel Portal Art Print
Translation missing: en.products.product.sale_price From £11.95£19.95 -

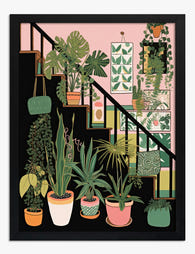
Botanical Staircase Haven Canvas Print
Translation missing: en.products.product.sale_price From £44.95£74.95 -

Cozy Bookstore Art Print
Translation missing: en.products.product.sale_price From £11.95£19.95 -

Winter Strolls Art Print
Translation missing: en.products.product.sale_price From £11.95£19.95 -

Welcome Home Statement Art Print
Translation missing: en.products.product.sale_price From £11.95£19.95 -

Vibrant Stairway Canvas Print
Translation missing: en.products.product.sale_price From £44.95£74.95 -

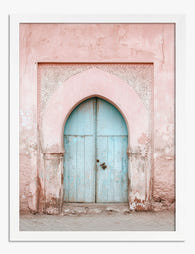
Moroccan Blue Doorway Art Print
Translation missing: en.products.product.sale_price From £11.95£19.95 -

Graceful Balance Minimal Art Print
Translation missing: en.products.product.sale_price From £11.95£19.95 -

Sunlit Italian Alleyway Art Print
Translation missing: en.products.product.sale_price From £13.99£19.99 -

Pastel Archway Entrance Canvas Print
Translation missing: en.products.product.sale_price From £44.95£74.95 -

Vibrant Urban Entryway Canvas Print
Translation missing: en.products.product.sale_price From £44.95£74.95 -

Blush Archway Entry Canvas Print
Translation missing: en.products.product.sale_price From £44.95£74.95 -

Vibrant Hillside Journey Art Print
Translation missing: en.products.product.sale_price From £13.99£19.99 -

Winter Walk with Books Art Print
Translation missing: en.products.product.sale_price From £11.95£19.95 -

Garden Welcome Art Print
Translation missing: en.products.product.sale_price From £11.95£19.95


More from The Frame

How to Decorate with Vintage London Prints (Roo...
Vintage London prints are everywhere right now, from Brooklyn brownstones to Bristol terraces. The trick is making them feel collected and considered rather than like you raided a National Trust...

How to Build a Gallery Wall Around One Inspirat...
Most gallery walls fail because they try to say too much. A truly great inspirational display works like a well-edited sentence: one strong message, supported by quieter elements that hold...

How to Build a City-Themed Gallery Wall That Ac...
Most failed gallery walls die at the same step: someone buys five prints they love individually, hangs them, and realises they have nothing in common. City art is especially prone...