How to Build a Street Art Gallery Wall That Doesn't Look Like a Mess
A practical framework for arranging bold, chaotic prints into a wall display that looks deliberate, not accidental.

Street art was made to break rules, which is exactly why it intimidates people on gallery walls. The good news: its inherent chaos is actually a feature, not a bug. You just need a few rules to corral it.
Why street art is perfect for gallery walls (and why most people overthink it)
Gallery walls thrive on visual energy, and street art has that in abundance. Bold lines, saturated colour, layered typography, political wit, photographic grit. A grouping of street art prints carries more personality than ten polite botanical illustrations ever will.
The mistake most people make is treating street art like fine art, then panicking when their pieces clash. Street art is meant to clash. It's meant to argue with itself. Your job isn't to make it tidy. Your job is to give the chaos a frame, literally and visually, so the wall reads as deliberate rather than accidental.
Here's the counterintuitive bit: street art is more forgiving than minimalist or watercolour gallery walls, not less. A small misalignment on a delicate line drawing is glaring. The same misalignment on a Banksy-style stencil or a graffiti typography print? Invisible. The medium absorbs imperfection.

Pick a thread: colour palette, monochrome, or mixed media
Cohesion is the difference between a gallery wall and a notice board. You need one thread running through every print, even if everything else is wildly different. Pick one of these three approaches and commit.
Colour palette
Choose two or three colours that appear in every piece. Maybe it's red, black and cream. Maybe it's the muted teal-and-pink combination that runs through a lot of contemporary stencil work. The prints can be totally different in subject and style, but if your eye keeps catching the same colours bouncing across the wall, your brain reads it as a set.
This is our favourite approach because it gives you the most freedom. A photograph of a graffitied alleyway, a typographic poster, and an abstract spray-paint piece can all live together if they share a palette.
Monochrome
Black and white only. No exceptions, not even a small accent of colour. This is the easiest thread to maintain and the hardest to get wrong. Stencil work, photojournalism-style street photography, and high-contrast typography all sit naturally in this lane.
The trade-off: monochrome can feel cold in a room that doesn't have warm textiles or wood to soften it. Plan accordingly.
Mixed media, single subject
Every print features the same subject (faces, hands, urban architecture, animals reimagined as graffiti) but in completely different styles and palettes. This is the most editorial-feeling approach and works brilliantly above a console table or in a hallway where people pause to look.
Whichever thread you pick, write it down before you buy anything. The minute you start adding "just one more" print that breaks the rule, the wall stops working.
How many prints you actually need
This is the question nobody answers properly, so here it is.
- Small wall (1.2 to 1.8 metres wide): 3 to 4 prints. Above a desk, a small console, or in a hallway nook.
- Standard wall (2.4 to 3 metres wide): 4 to 7 prints. The classic sofa wall, dining wall, or bedroom feature wall.
- Large wall (3 metres or wider): 7 to 11 prints, or use a single XL canvas as the anchor with 4 to 6 satellites.
The instinct is always to add more. Resist it. A gallery wall with too many small prints starts to look like a Pinterest mood board printed at A5. The eye needs negative space to register each piece.
If you're working with a standard sofa wall, five prints is the sweet spot. One large piece around 70x100cm, paired with four smaller pieces around 30x40cm or 40x50cm, will fill the space without overwhelming it.
The layout template that works every time
There are dozens of gallery wall layouts, and most of them fail with street art because they assume your pieces are quiet. They aren't. You need a layout that gives the boldest piece somewhere to sit without competing with itself.
Use this: one large anchor, smaller satellites.
Pick your most arresting piece. The one with the strongest composition or the most saturated colour. That's your anchor. It goes slightly off-centre, usually about a third of the way in from one side. Then arrange your satellites around it in an asymmetric cluster.
The anchor does the heavy lifting. The satellites support it. Because there's a clear hierarchy, the eye knows where to land first, and the wall reads as composed rather than competitive.
The asymmetric cluster rule
Don't grid your satellites. A perfect grid will fight your anchor for attention. Instead, vary the spacing slightly so the satellites feel like a constellation around the anchor rather than a regiment.
Keep 3cm of space between every frame, no more, no less. This is the magic number. Closer than 3cm and the wall looks cramped. Wider than 5cm and the prints stop reading as a single composition.

Mixing street art with photography and abstract prints
Pure street art walls can feel one-note after a few weeks. The trick to longevity is mixing in adjacent genres that share street art's energy without copying its language.
Photography prints, particularly black-and-white urban photography, sit beautifully alongside graffiti and stencil work. A grainy shot of a New York fire escape next to a typographic poster looks like the same world told two ways. The texture of the photograph balances the flatness of the print.
Abstract prints are the other natural partner. Look for abstracts with hand-drawn marks, drips, or splashes (the visual DNA of spray paint and ink) rather than smooth digital gradients. Anything that looks like it was made by a hand, fast, will fit.
What to avoid in the mix: anything overly precious. Botanical illustrations, soft pastels, fine line drawings. They'll make your street art look aggressive and your delicate pieces look fussy. Both lose.
Framing consistency: why matching frames hold a chaotic theme together
This is the single most important decision you'll make, and most people get it wrong.
When the art is loud, the frames must be quiet. Identical frames, identical mounts, identical dimensions of border around each print. The frames become a visual grid that contains the chaos.
We'd argue uniform black frames are the strongest choice for street art. They echo the inked lines and high contrast in most graffiti and stencil work, and they read as urban rather than precious. Natural oak is the other reliable option, particularly if the rest of your room leans warm and Scandinavian. Avoid white frames with street art unless the whole room is gallery-white. They tend to look insubstantial.
A note on construction. The biggest reason gallery walls look amateur is bad framing: warped frames, prints that have shifted inside the mount, or frames that arrived separately from the prints and never quite sat right. Our framed prints arrive with the print already fitted properly inside a solid FSC-certified wood frame, with UV-protective acrylic glaze rather than glass (lighter, safer, no glare on bold colours). Fixtures are attached. You hang them and they sit flat.
The acrylic point matters more than it sounds. Street art is often hung in living rooms and hallways with strong overhead light. Glass throws glare across saturated colour and you lose half the impact. Acrylic doesn't.
Step-by-step hanging guide with spacing measurements
Don't hang anything until you've done this on the floor first.
1. Lay it out on the floor.
Use the floor space directly below the wall. Arrange your prints exactly as you want them on the wall, with a tape measure ensuring 3cm between every frame. Move pieces around. Take a photo. Move them again. Spend longer on this than you think you need to.
2. Make paper templates.
Trace each frame onto kraft paper or newspaper. Cut out the templates. Mark the position of the hanging hook on the back of each frame, then mark the corresponding spot on the paper template.
3. Tape the templates to the wall.
Use low-tack masking tape. Arrange them in your chosen layout. Step back across the room. Live with it for an hour. Adjust.
4. Get the height right.
The centre of your anchor piece should sit at roughly 145 to 150cm from the floor (standard gallery height). If the wall is above a sofa or sideboard, the bottom edge of the lowest frame should be 15 to 20cm above the top of the furniture. Closer than 15cm feels squashed. Further than 20cm and the art floats away from the room.
5. Hammer through the templates.
Drive your picture hooks straight through the marked spot on each paper template. Tear the paper away. Hang.
6. Step back and check.
Use a small spirit level on each frame. With street art, slightly off-level reads as wrong, not as charmingly handmade. Get them straight.

Three gallery wall combos we'd actually put in our own homes
The Berlin apartment
Five prints, all monochrome. One large stencil-style anchor at 70x100cm, two black-and-white urban photographs at 40x50cm, one typographic poster at 30x40cm, one abstract ink piece at 30x40cm. Black frames throughout. Hung above a tan leather sofa with a concrete-look floor lamp nearby. Reads as adult, considered, a little bit defiant.
The colour-pop family room
Six prints sharing a red, cream and navy palette. Mix of pop-art-influenced urban wall art prints, one piece of figurative abstract, and a graphic typography print. Natural oak frames soften the boldness. Works above a family sofa where you want energy without aggression.
The hallway statement
Seven prints, single subject (faces, every one of them, but each rendered in a totally different style: stencil, photographic, abstract, line drawing, collage). Black frames, tightly clustered with 3cm spacing. Works in a long hallway because people walk past slowly and notice each one. Conversation-starter on every visit.
If you're building one of these from scratch and want a head start on cohesion, our curated wall art sets are matched for palette and frame style, which solves most of the threading work for you.
A few last things worth saying
Add to your gallery wall over time. Buy the anchor first, live with it, then add satellites as you find pieces you genuinely love. The walls that look best are almost never bought in one transaction.
Light it properly. A single warm-toned wall light or a picture light over the anchor lifts the whole arrangement at night. Overhead spots flatten everything and create glare.
And give yourself permission to move things. The 99-day return window exists because we know you'll order something, hang it, and occasionally realise it doesn't sit right. That's part of the process. The best gallery walls are edited, not assembled.


Fab products featured in this blog
-

Red Tower on Dusty Blue Art Print
Sale price From £11.95£19.95 -

Vibrant City Streets Canvas Print
Sale price From £49.95£74.95 -

Bold Balance Brushwork Canvas Print
Sale price From £49.95£74.95 -
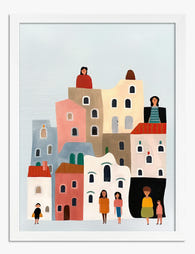
Little Town, Tall Houses Art Print
Sale price From £11.95£19.95 -

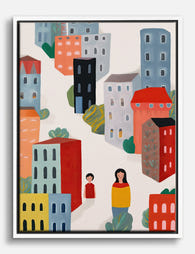
Vibrant City Streets Art Print
Sale price From £11.95£19.95 -

Neutral Brushstrokes Abstract Canvas Print
Sale price From £49.95£74.95 -

Montmartre Morning Art Print
Sale price From £11.95£19.95 -

Urban Geometry Art Print
Sale price From £11.95£19.95 -
Colourful City Stroll Canvas Print
Sale price From £49.95£74.95 -

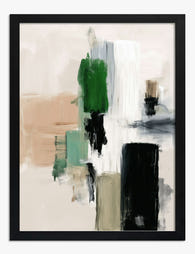
Urban Earth Abstract Art Print
Sale price From £11.95£19.95 -
Urban Green Abstract Art Print
Sale price From £11.95£19.95 -

Red Tower on Dusty Blue Canvas Print
Sale price From £49.95£74.95 -

Pastel London Streetscape Canvas Print
Sale price From £49.95£74.95 -
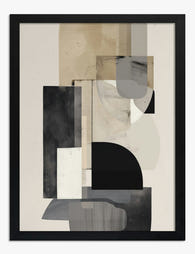
Urban Neutral Geometry Art Print
Sale price From £11.95£19.95 -

Berlin Pastel Streetscape Canvas Print
Sale price From £49.95£74.95 -

Parisian Daydream Street Art Print
Sale price From £11.95£19.95 -

Colourful City Stroll Art Print
Sale price From £11.95£19.95 -
City Strolls in Red and Grey Canvas Print
Sale price From £49.95£74.95 -

Pastel London Street Scene Art Print
Sale price From £11.95£19.95 -
Sunny City Street Cut-Out Art Print
Sale price From £11.95£19.95


More from The Frame

The Best Wall Art for Plant Lovers (That Doesn'...
You already have too many plants. You know it, your partner knows it, the fiddle leaf fig blocking the window knows it. But your walls are still bare, and there's...

Are Botanical Prints Still in Style? The Trend ...
Botanical prints have been declared "over" roughly every three years since 2015, and yet they keep hanging on more walls than ever. The truth is they're not a trend at...

Room-by-Room or Whole-Home? Styling Botanical P...
Most botanical prints are hung wrong. They're too small for the wall, glossy in rooms that need calm, and floating at eye level above sofas they should be anchoring. This...